
To improve your night footage, start by adjusting your white balance to match ambient light, ensuring natural colors. Use a wider aperture and increase ISO gradually to brighten scenes without introducing too much noise. Combine these with slower shutter speeds for more light, but watch for motion blur. Using neutral density filters can help manage bright light sources. Practice and experiment with these exposure tricks—if you keep at it, you’ll discover even better results.
Key Takeaways
- Adjust white balance to match ambient lighting for accurate, vibrant night colors.
- Use a wider aperture and lower ISO to maximize light intake while minimizing noise.
- Balance shutter speed to allow enough light without causing motion blur.
- Employ ND filters to control bright light sources without overexposing your shot.
- Practice and experiment with combined settings to achieve optimal exposure and scene brightness.
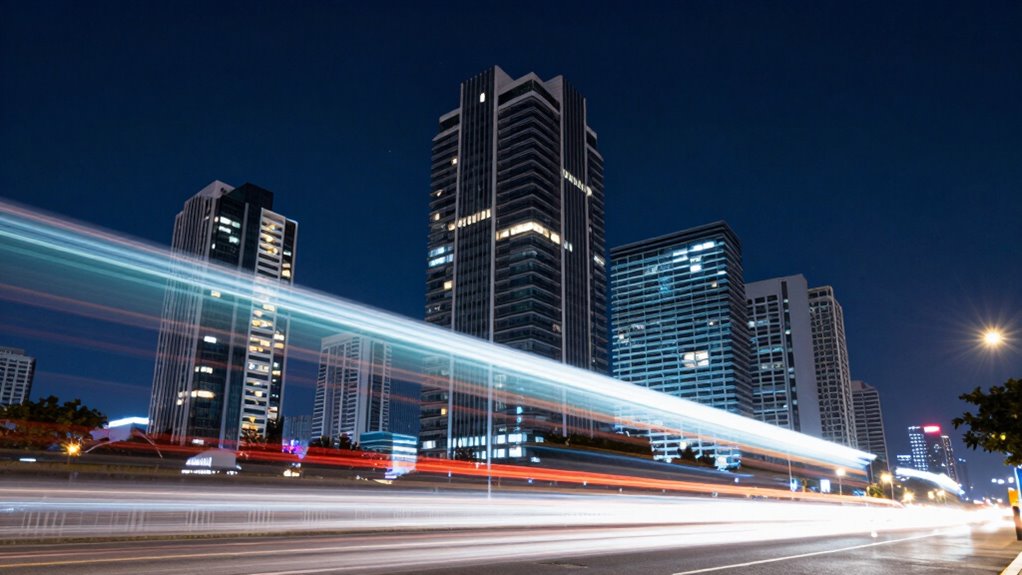
Capturing sharp, vibrant night footage can be challenging, but mastering exposure tricks makes all the difference. When you’re filming in low light, adjusting your camera’s light balance is vital. This involves setting your white balance correctly to match the ambient lighting conditions. If you don’t, your footage might look unnatural or washed out. Experiment with different presets or manually tweak the white balance to guarantee colors appear accurate and true to life. Proper light balance not only enhances the mood but also helps you avoid color distortions that can ruin your shot.
Adjust white balance accurately to ensure natural, vibrant colors in night footage.
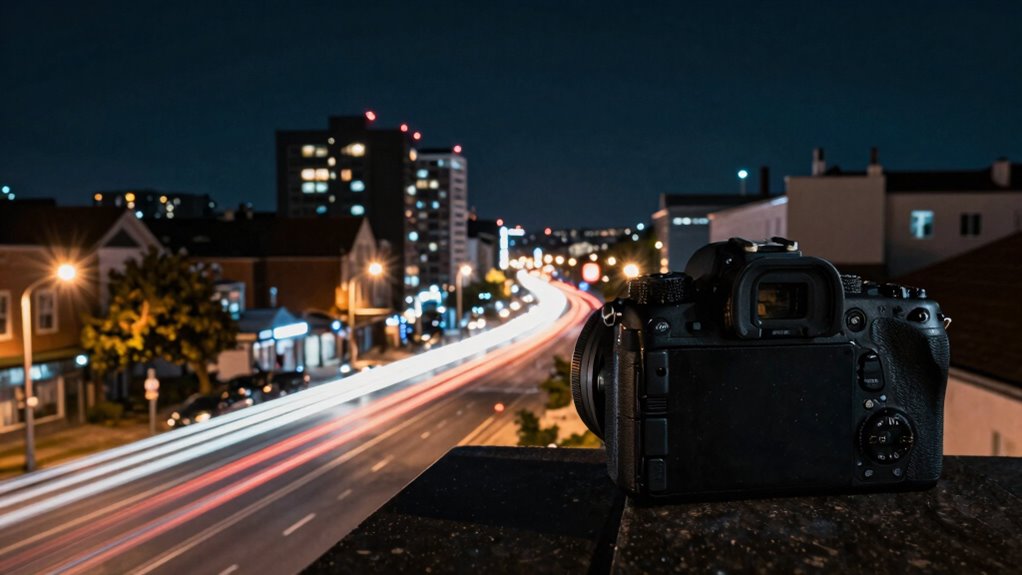
Next, pay close attention to your ISO settings. ISO controls your camera’s sensitivity to light. When shooting at night, you’ll typically need to increase ISO to compensate for the darkness. However, raising ISO too high can introduce noise, which degrades image quality. To find the sweet spot, start with a lower ISO, around 800 or 1600, and gradually increase until you achieve a well-exposed shot without excessive grain. Modern cameras handle higher ISO levels better, so don’t be afraid to push the envelope if necessary, but always review your footage for noise. Using a camera with good noise reduction capabilities can help you shoot at higher ISOs while keeping your footage clean.
Balancing ISO with your aperture and shutter speed is essential. A wider aperture allows more light to hit the sensor, reducing the need for high ISO. A slower shutter speed lets in more light by keeping the shutter open longer, but be cautious not to introduce motion blur, especially if you’re filming moving subjects. Combining these settings thoughtfully ensures your footage is bright enough without sacrificing detail or introducing unwanted artifacts. Adjusting these settings in tandem can also help you optimize exposure for various night scenes. Additionally, some cameras feature auto-exposure modes that can assist in maintaining consistent brightness during dynamic lighting changes, although manual control often yields better results. Understanding how your camera’s exposure settings interact will give you more control over the final image quality.
Furthermore, understanding how different exposure tricks influence your footage will help you achieve more consistent results in various lighting conditions. For example, using ND filters can help manage bright light sources without altering your camera settings excessively. Ultimately, the key to capturing stunning night footage lies in understanding and adjusting light balance and ISO settings precisely. Practice makes perfect—so spend time experimenting with different combinations until you find the perfect exposure for your scene. With patience and attention to detail, you’ll transform those dark, challenging shots into vibrant, cinematic night scenes.
Better Available Light Digital Photography: How to Make the Most of Your Night and Low-Light Shots
New
As an affiliate, we earn on qualifying purchases.
As an affiliate, we earn on qualifying purchases.
Frequently Asked Questions
What Camera Settings Are Best for Night Footage?
You should set your camera to a high sensor sensitivity, like a higher ISO, to capture more light in low-light conditions. Keep your aperture wide open to allow maximum light in, which enhances brightness and detail. Adjust the exposure time to be longer without overexposing your shot. These settings work together: a higher ISO, wide aperture, and longer exposure help you get clear, bright night footage.
How Do I Reduce Noise in Night Shots?
To reduce noise in night shots, you should lower your camera’s sensor sensitivity (ISO) as much as possible while maintaining proper exposure. Use noise reduction features in your camera or editing software to smooth out grain. Additionally, shooting with a longer exposure can help gather more light, decreasing the need for high ISO. Combining these techniques ensures clearer, cleaner night footage with minimal noise and better overall quality.
Is a Tripod Necessary for Nighttime Filming?
A tripod isn’t always necessary for nighttime filming, but it’s highly recommended as a key night photography accessory. Using a tripod stabilizes your camera, allowing you to use slower shutter speeds without blur. This results in sharper images and smoother footage. If you want professional-looking night shots, investing in a sturdy tripod improves stability and overall quality, making it a valuable tool for capturing clear, well-exposed nighttime footage.
Can I Shoot Night Footage With a Smartphone?
Yes, you can shoot night footage with a smartphone. Just focus on street lighting and moon phases to maximize your shots. Use steady hands or a makeshift tripod to prevent blurring, and tap to focus in low light. Capture the mesmerizing contours of the night by adjusting exposure settings, and consider shooting during brighter moon phases for better brightness. With patience and practice, your smartphone can produce surprisingly professional night footage.
How Do I Focus Accurately in Low Light?
To focus accurately in low light, use focusing techniques like tap-to-focus on your smartphone screen to target a specific subject. Autofocus challenges often occur in dim conditions, so consider switching to manual focus if possible. Keep your camera steady, and increase the exposure slightly to improve image brightness, which helps the autofocus system work better. Using a small flashlight briefly can also aid in focusing on distant objects.

K&F CONCEPT 67mm Variable ND2-ND400 ND Lens Filter (1-9 Stops) for Camera Lens Adjustable Neutral Density Filter with Microfiber Cleaning Cloth (B-Series)
【Import Optical Glass】Crafted from premium AGC optical glass with 8 multi-layer coatings, this ND filter reduces reflections and…
As an affiliate, we earn on qualifying purchases.
As an affiliate, we earn on qualifying purchases.
Conclusion
Practicing these exposure tricks is like lighting a candle in a dark room—you’ll find your footage suddenly comes alive with clarity and detail. I once shot a cityscape at night, adjusting my settings just right, and the results were breathtaking, like revealing a hidden treasure. Remember, every shot is a puzzle waiting to be solved. Keep experimenting with exposure, and you’ll discover the secret to stunning night footage, turning shadows into stories worth sharing.

ULANZI VL49 RGB Video Lights, LED Camera Light 360° Full Color Portable Photography Lighting w 3 Cold Shoe, 2000mAh Rechargeable CRI 95+ 2500-9000K Dimmable Panel Lamp Support Magnetic Attraction
【Professional RGB LED Video Lights】The new version VL49 RGB LED video light adopts 60 high color rendering led…
As an affiliate, we earn on qualifying purchases.
As an affiliate, we earn on qualifying purchases.

Beginners’ Guide to Sony A6700: The Advanced Manual Control Tutorials for Optimal Exposure and Sharp Imagery
As an affiliate, we earn on qualifying purchases.
As an affiliate, we earn on qualifying purchases.