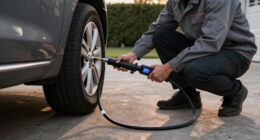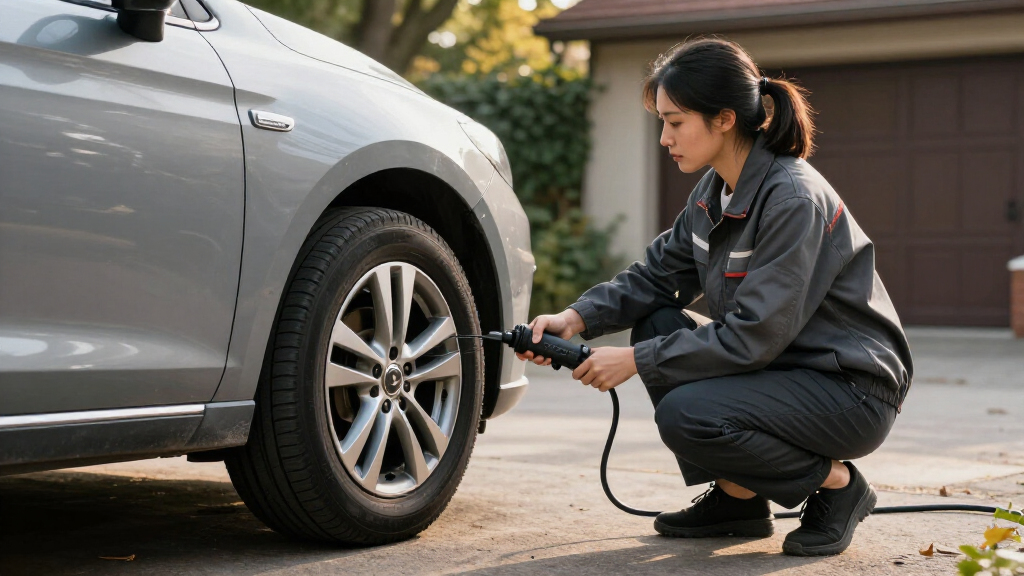
This guide shows you how to use a portable automatic tire inflator to add air to a vehicle tire and check that the final pressure matches the vehicle maker’s recommendation. It is for drivers who have little or no experience with tire inflators. Allow about 10-20 minutes per tire, including setup and pressure checks. The inflator can help with an underinflated tire, but it cannot safely repair a puncture, sidewall damage, or a tire that has come off its rim.

Get business pricing on garage and car supplies
- Business-only prices and quantity discounts
- Tax-exempt purchasing
- Multiple users, one account, clear invoices

OlarHike Portable Tire Inflator Air Compressor, Dual Power, 3 x 2000mAh Battery & 12V DC
- ✔ Power: Cordless battery or 12V DC
- ✔ Battery: 3 x 2000 mAh
- ✔ Maximum supported pressure: 51 PSI for cars and light pickups
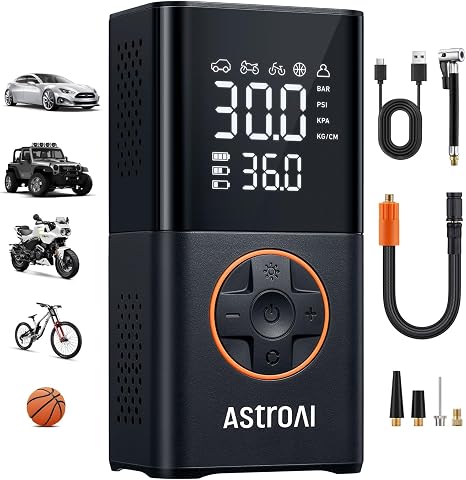
AstroAI L7 Cordless Portable Tire Inflator, 150 PSI
- ✔ Maximum pressure: 150 PSI
- ✔ Battery capacity: 4000 mAh
- ✔ Weight: Less than 1 lb

Airmoto Tire Inflator Portable Air Compressor for Cars, Bikes and Bicycles
- ✔ Maximum pressure: 120 PSI
- ✔ Battery: 2000 mAh rechargeable, USB-C charging
- ✔ Display: Large LCD with digital tire pressure gauge
Difficulty: Beginner | Time: 10-20 minutes per tire
What You’ll Need
Tools & Materials:
- Automatic tire inflator compatible with your tire’s valve and power source
- Vehicle owner’s manual or the tire-pressure label on the driver-side door frame
- Tire pressure gauge, if the inflator’s reading needs a separate check
- Gloves and a flashlight, if working in low light
Knowledge:
- How to locate the tire-pressure label or owner’s manual
- How to identify a tire’s valve stem and remove its cap
- How to connect the inflator to its power source
Check the inflator manual for its power limits, operating instructions, and maximum duty cycle. Some units plug into a vehicle’s 12-volt outlet, while others use a battery or connect to the battery terminals. Use only the power method specified for your model. Do not use a damaged cord, a cracked air hose, or a unit that is wet or visibly damaged.
OlarHike Portable Tire Inflator Air Compressor, Dual Power, 3 x 2000mAh Battery & 12V DC
The OlarHike earns the top spot because it pairs cordless convenience with 12V DC backup. That second power path matters when we need to inflate several tires or do not want the task to depend entirely on a charged internal battery. Its stated times—55 seconds for a standard car tire from 30 to 35 PSI and 2.2 minutes for an SUV tire over the same range—also make it the speed-focused choice in this group.Automatic shutoff, memory recall, and a dual LED screen help make repeat pressure checks more straightforward. The AstroAI L7 is lighter and supports a broader range of preset uses, but the OlarHike is better equipped for vehicle-focused top-ups where speed and continuous 12V power matter. Its cordless runtime is stated as up to 18 standard car tires or 11 SUVs per charge, though actual results can vary with tire size and conditions.There are clear boundaries: the OlarHike supports cars and light pickups up to 51 PSI, and it is not compatible with heavy-duty pickups or RVs. It weighs 1.2 lb, slightly more than the AstroAI, and requires a specified 5V charging adapter. We would choose it for mainstream cars and SUVs, not for high-pressure or heavy-duty applications.
Pros:
- Cordless battery operation plus 12V DC power
- Stated inflation time of 55 seconds for a standard car tire from 30 to 35 PSI
- Automatic shutoff, memory recall, and dual LED display
- Includes adapters, storage bag, flashlight, and USB output
Cons:
- Not compatible with heavy-duty pickups or RVs
- Maximum supported tire pressure is 51 PSI
- Charging requires a 5V 2A or 5V 3A adapter
Best for: Drivers of cars, SUVs, and light pickups who want fast inflation with both battery and 12V power available.
Not ideal for: Owners of RVs, heavy-duty pickups, or vehicles requiring more than 51 PSI, and buyers who want the lightest unit.
Bottom line: For everyday cars and SUVs, the OlarHike is the most versatile automatic inflator here because fast stated inflation is backed by a 12V power option.
“For everyday cars and SUVs, the OlarHike is the most versatile automatic inflator here because fast stated inflation is backed by a 12V power option.”
AstroAI L7 Cordless Portable Tire Inflator, 150 PSI
At less than 1 lb, the AstroAI L7 is the easiest choice here for drivers who want a compact inflator that can move between a glove box, bike kit, or travel bag. Its presets cover cars, motorcycles, bicycles, and balls, while a custom pressure setting gives us room to choose a target ourselves. Automatic shutoff handles the stop point, so we do not need to watch the gauge throughout inflation.Against the Airmoto, the AstroAI has double the listed battery capacity and a stated ability to inflate up to eight 195/65R15 tires from 30 to 36 PSI on a full charge. It also offers USB input/output ports and three flashlight modes. The OlarHike is faster by its stated standard-car timing and can draw power from a 12V outlet, but it is heavier and oriented more toward vehicle top-ups than a lightweight multi-use kit.The L7’s 150 PSI maximum should not be mistaken for unlimited tire compatibility: it is not suitable for tires larger than 25 inches. Its stated inflation example is useful context—about 1.5 minutes for a 195/65R15 tire from 30 to 36 PSI—and the unit needs a 10-minute rest after 15 minutes of continuous operation. This makes it a strong portable choice for routine tires, rather than sustained inflation work.
Pros:
- Weighs less than 1 lb and is easy to carry
- Automatic shutoff with vehicle, bike, ball, and custom modes
- Stated runtime of up to eight standard car tire top-ups per charge
- Flashlight with SOS and strobe modes plus USB power ports
Cons:
- Not suitable for tires larger than 25 inches
- Requires a 10-minute rest after 15 minutes of continuous use
- No 12V DC operating option is listed
Best for: Drivers and cyclists who value low weight, multiple preset modes, and a compact cordless device for occasional top-ups.
Not ideal for: Owners of tires over 25 inches or anyone who expects long, continuous inflation sessions.
Bottom line: The AstroAI L7 is our best lightweight all-rounder for mixed vehicle and bike use, provided its tire-size and duty-cycle limits fit the job.
“The AstroAI L7 is our best lightweight all-rounder for mixed vehicle and bike use, provided its tire-size and duty-cycle limits fit the job.”
Airmoto Tire Inflator Portable Air Compressor for Cars, Bikes and Bicycles
The Airmoto is the pick for buyers who put easy storage and simple operation ahead of repeated inflation capacity. Its cordless form, large LCD, preset-pressure shutoff, and retractable hose cover the essentials for a quick check in the trunk or glove box. A deflate button is also handy when we need to bring pressure down slightly after checking it.Its supplied Schrader, Presta, needle, and general adapters make it more flexible across cars, bicycles, and sports equipment than a vehicle-only pump. The AstroAI L7 is the stronger match if we want a larger listed battery and explicit multi-mode flashlight; the Airmoto’s 2000 mAh battery is smaller, and its description cautions that larger or high-pressure tires drain it quickly. The OlarHike is a better option for fast repeated car and SUV top-ups, especially when 12V power is available.With a 120 PSI maximum, the Airmoto has ample stated pressure range for many ordinary tire tasks, but that figure does not make it suitable for high-volume inflatables. The supplied information specifically excludes air mattresses and paddle boards, and cold weather can reduce battery efficiency. Choose it for occasional portable top-ups; skip it if we need sustained output or dependable performance in cold conditions.
Pros:
- Compact form designed for glove-box or trunk storage
- Automatic shutoff with readable LCD and multiple pressure units
- Includes Schrader, Presta, needle, and general adapters
- Retractable hose, deflate button, and built-in LED flashlight
Cons:
- The 2000 mAh battery drains quickly on larger or high-pressure tires
- Not intended for high-volume items such as air mattresses or paddle boards
- Cold weather reduces battery efficiency
Best for: Drivers and cyclists who want a small, cordless inflator for occasional pressure corrections and varied valve types.
Not ideal for: People who routinely inflate larger tires, high-pressure tires, or high-volume items, especially in cold weather.
Bottom line: Choose the Airmoto for compact, occasional use across common valve types, but favor the AstroAI or dual-powered OlarHike for more demanding routines.
“Choose the Airmoto for compact, occasional use across common valve types, but favor the AstroAI or dual-powered OlarHike for more demanding routines.”
As an Amazon Associate we earn from qualifying purchases.
Before You Start
Park on firm, level ground away from moving traffic. Set the parking brake and switch off the engine unless the inflator manual calls for a running engine to power a 12-volt outlet. Keep the inflator’s power cord and hose clear of hot parts, moving belts, and exhaust pipes. If the tire is hot from driving, its pressure reading may be higher than when cold. The vehicle’s recommended cold pressure is the target; check and adjust tires when they have been parked for about three hours or driven less than a mile at low speed. If you need to add air now, use the label value as a reference and recheck the tire when it is cold.
Do not inflate a tire that has a bulge, deep cut, exposed cords, a damaged valve, or a bead that has separated from the wheel. Do not stand beside the sidewall while adding air to a visibly damaged or badly underinflated tire. Use the spare tire or contact roadside assistance or a tire professional instead. A tire inflator adds air; it does not repair structural damage or make an unsafe tire roadworthy.
Step-by-Step Instructions
Step 1: Find the target pressure
Read the recommended cold tire pressure on the vehicle’s driver-side door-frame label or in the owner’s manual. Note the value for the tire you are inflating, including the front or rear position if the values differ. Use the vehicle recommendation rather than the maximum pressure molded into the tire sidewall; that sidewall figure is not the vehicle’s normal target.
Tip:Pressure is usually listed in pounds per square inch (PSI), kilopascals (kPa), or bar. If your inflator uses a different unit, convert the target using its display or manual before starting.
Check: You have a clear target and know which unit the inflator will display.
Step 2: Inspect the tire and inflator
Look over the tread, sidewall, wheel, and valve stem. Remove dirt from around the valve and check that the hose, connector, power cable, and inflator body have no visible damage. Move the inflator beside the tire on stable ground, with enough slack in the hose and cable to reach the valve without pulling or stretching them.
Tip:If the tire looks damaged, is nearly flat, or has lost pressure quickly, stop and arrange a professional inspection. Do not rely on an inflator to address a leak or damage.
Check: The tire has no obvious damage, and the inflator and its connections appear intact.
Step 3: Connect the inflator to power
Follow the inflator manual to connect its power source. Plug a 12-volt model into the specified outlet, or connect a battery-powered unit as instructed. Keep the vehicle outlet and power connection dry. If using battery clamps, attach them to the terminals in the order shown in the manual and keep the clamps from touching each other or nearby metal.
Tip:Do not assume that every vehicle outlet can supply enough current for an inflator. If the unit does not start, check the manual and vehicle outlet before trying another power source.
Check: The inflator powers on without an error, unusual noise, smoke, or a hot or loose connection.
Step 4: Set the target on the inflator
Remove the valve cap and store it where it will not roll away. Turn on the inflator and select the pressure unit that matches your target. Use the controls to set the vehicle’s recommended pressure. Check the displayed number and unit before you attach the hose or start inflation.
Tip:Some inflators remember a previous setting. Do not start until the current target matches the value on the vehicle label or in the manual.
Check: The display shows the intended target pressure in the correct unit.
Step 5: Attach the air hose
Press the inflator connector straight onto the valve stem and secure it according to the connector design. A screw-on connector should be snug; do not force it or overtighten it. A lever connector should lock into place. Listen for a brief hiss as the connection settles, then check that continuous air is not escaping around the fitting.
Tip:If the connector will not attach, check whether it needs a lever lifted or lowered, or whether an adapter is required. Keep the valve stem straight; bending it can damage the valve.
Check: The connector stays in place, and there is no continuous hiss at the valve.
Step 6: Inflate the tire
Start the inflator using its control. Stay beside the unit and watch the pressure display as the tire fills. Most automatic models stop when they reach the preset target, but remain present so you can stop the unit if the reading rises past the target, the hose slips, or the equipment behaves unusually. Follow the manual’s duty-cycle limit; switch the unit off and let it cool for the stated period if it becomes hot or reaches its run-time limit.
Tip:Inflators can be loud and may take several minutes, particularly when a tire is very low. Do not leave the unit running unattended, and do not touch hot parts.
Check: The inflator stops at or near the target without an error or unusual behavior.
Step 7: Check the pressure and disconnect
Switch off the inflator if it has not stopped automatically. Release the connector as directed by its design, keeping your face and fingers clear of the fitting because a small amount of air may escape. Read the tire pressure promptly with the inflator display or a separate gauge. If the pressure is below the target, reconnect and add air in short intervals. If it is above the target, release a little air using the valve pin, then measure again.
Tip:Pressure can drop briefly as you disconnect the hose. If the reading is close to the target, take another measurement after reconnecting the gauge or inflator; use a consistent, properly seated connection.
Check: A pressure reading shows the vehicle’s recommended value, within the accuracy range stated for your measuring device.
Step 8: Replace the cap and finish
Reinstall the valve cap by hand and tighten it until it is secure without forcing it. Turn off and unplug the inflator, then store its hose and cable as the manual describes. If you adjusted other tires, repeat the procedure for each one using its own recommended pressure. Check that all caps are in place before driving.
Tip:If the tire needed repeated air additions, loses pressure again, or triggers a low-pressure warning after driving, arrange an inspection. Air loss can point to a puncture, valve leak, or wheel problem.
Check: The tire is at the recommended pressure, the cap is fitted, and the inflator is switched off and stored.
Common Mistakes to Avoid
- Using the maximum pressure printed on the tire sidewall as the inflation target. — Read the vehicle’s driver-side label or owner’s manual. The vehicle recommendation is the normal target for that tire position.
- Setting the inflator in the wrong pressure unit or relying on its previous setting. — Match the display unit to the target and verify the displayed number before starting the pump.
- Leaving the inflator running unattended or past its duty-cycle limit. — Stay with the unit, watch its display, and follow the run and cool-down times in its manual.
- Assuming a tire is safe because it holds air after inflation. — Inspect for cuts, bulges, exposed cords, rapid pressure loss, and valve or wheel damage. Get a damaged or repeatedly deflating tire checked by a tire professional.
Troubleshooting
Problem: The inflator does not turn on.
Solution: Switch it off and check the power connection, battery charge, vehicle outlet, and any fuse specified in the manual. Do not replace a fuse with a higher-rated one. If the power source works but the inflator remains off, stop using the unit and contact its maker or a repair service.
Problem: Air hisses from the hose connection.
Solution: Switch off the inflator, remove the connector, and check that the valve stem is clean and straight. Reattach the fitting in the correct position. If it still leaks, try an approved adapter or inspect the connector seal. Do not continue if the valve itself appears damaged.
Problem: The pressure reading does not rise or drops quickly.
Solution: Check that the connector is seated and the hose is not kinked. If air still escapes or the tire will not hold pressure, stop inflation and arrange a tire inspection. A puncture, loose valve core, or damaged wheel may need repair.
Problem: The inflator runs for a long time, stops early, or becomes hot.
Solution: Switch it off and let it cool for the period stated in its manual. Confirm that the target setting, hose connection, and power source are correct. Resume only if the manual allows another run; seek help if the tire still will not reach pressure or the unit shows an error.
What Success Looks Like
The tire’s measured pressure matches the vehicle maker’s recommended cold pressure for its position, the valve cap is back in place, and the inflator has been disconnected and stored. The tire shows no visible damage or rapid air loss. If a low-pressure warning remains after the tires have been adjusted and the vehicle has been driven as directed in its manual, check the tire pressures again and consult the vehicle manual or a service professional.
Next Steps
Recheck the tire when it is cold if you inflated it after driving. Check all tires, including the spare if the vehicle maker recommends it, on a regular schedule and before long trips. Keep the inflator, adapters, and instructions together in the vehicle, and inspect the unit’s cord and hose before future use. If a tire loses pressure again, develops visible damage, or needs frequent top-ups, have a tire professional find the cause rather than repeatedly adding air.
Frequently Asked Questions
Should I inflate a tire when it is hot?
Use the vehicle’s recommended cold pressure as the target. Tire pressure rises as the tire warms during driving. If you must add air while the tire is hot, do not bleed air to make the reading match the cold target; recheck and adjust when the tire has cooled.
Can I use an automatic inflator on a completely flat tire?
Only if the tire is seated on the wheel, has no visible damage, and the inflator is rated for the job. A tire that is crushed, separated from its rim, or damaged may not inflate safely. Use a spare or call roadside assistance if you are unsure.
Why does the pressure reading change when I disconnect the hose?
A small amount of air can escape from the hose or valve during disconnection, and the measuring device may read differently depending on how it seats on the valve. Reattach the connector or gauge carefully and take another reading.
Can an automatic inflator fix a slow leak?
No. It can add air, but it cannot locate or repair a puncture, leaking valve, or wheel problem. If pressure drops again, arrange an inspection. Avoid driving on an underinflated tire, since it can overheat and fail.
Fall Picks
fall essentials
As an affiliate, we earn on qualifying purchases.