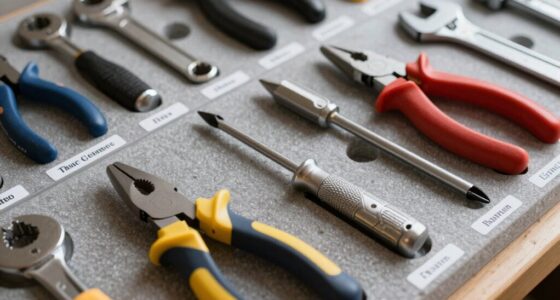
To pop panels without breaking clips, start by gathering the right tools like plastic pry bars or trim removal tools. Gently insert the tool behind the panel near the clips, applying light, steady pressure while moving along the edges. Work slowly and evenly to release each clip without forcing or twisting. If you encounter stubborn clips, try repositioning the tool or using a different one. Continuing will reveal more tips to guarantee a damage-free removal process.
Key Takeaways
- Use plastic pry tools to gently insert behind the panel near clips, avoiding excessive force.
- Identify clip types beforehand and select appropriate removal tools for each to prevent damage.
- Work slowly along the trim, applying even pressure to release clips gradually without breaking them.
- Remove weatherstripping carefully to access hidden clips without damaging the seal or panel.
- Support the panel with both hands during removal to prevent stress on clips and reduce the risk of breaking.
Removing trim from your vehicle can be straightforward if you know the right techniques. Whether you’re planning to replace damaged panels or just want a cleaner look, understanding how to perform clip removal and panel detachment without causing damage is vital. The key is patience and using the proper tools to gently release the clips that hold the trim in place.
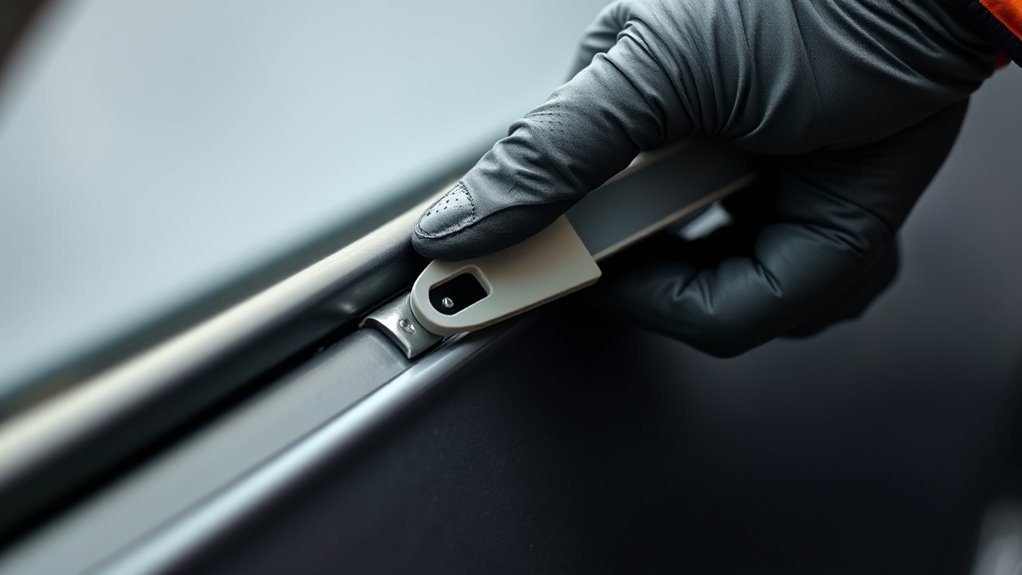
Start by inspecting the trim to identify the type and number of clips securing it. Most clips are designed to pop out when pressed or pried at specific points. To begin the removal process, gently insert a trim removal tool or a flat-head screwdriver behind the panel, near a clip. Be careful to avoid applying too much force, as aggressive prying can snap clips or damage the surrounding paint and plastic. When you locate a clip, apply gentle pressure to release it from its socket. If the clip resists, don’t force it; instead, reposition your tool or try using a plastic pry tool, which minimizes the risk of scratching or breaking.
Inspect the trim to identify clips and gently pry near them with proper tools for safe removal.
When detaching panels, work slowly and methodically, moving along the trim’s length. As you work, keep an eye out for hidden clips or fasteners that might be concealed under weatherstripping or rubber seals. Removing these carefully is vital to avoid tearing the seals or pulling out clips that could be embedded deep within the panel. If you encounter stubborn clips, a clip removal tool can be incredibly helpful. These tools are designed to grip the clips securely and pry them out evenly, reducing the chance of breakage. Remember, some clips are designed to be reusable, but they can become brittle over time, so handling them gently prolongs their usability. Additionally, understanding the clip types common in your vehicle can help you select the appropriate removal method and tools.
Once all clips are released, carefully lift the panel away from the vehicle, making sure no clips are still engaged or caught on the frame. Always support the panel with both hands to avoid dropping or bending it during removal. If you encounter resistance, double-check that all clips are fully disengaged before applying more force. Keeping the workspace organized and keeping track of the clips is also a good practice; it makes reinstallation easier and ensures you don’t lose any small fasteners.

GOOACC 5PCS Auto Trim Removal Tool Kit No-Scratch Pry Tool Kit for Car Door Clip Panel & Audio Dashboard Dismantle -5PCS
SAVE TIME, FRUSTRATION AND MONEY -There are 5 pcs different kinds of trim tools, including 4 pcs car…
As an affiliate, we earn on qualifying purchases.
As an affiliate, we earn on qualifying purchases.
Frequently Asked Questions
What Tools Are Best for Removing Stubborn Trim Clips?
You should use specialized clip removal tools like plastic pry tools or trim removal knives to handle stubborn trim clips. These tools help you gently pry the clips free without damaging the panels. Additionally, consider using a small pry bar or flat-head screwdriver as a last resort, but be careful to avoid breaking the clips. Proper tools make the job easier and guarantee you don’t damage your vehicle’s trim or clips.
How Can I Identify Different Types of Trim Clips?
You can identify different clip types by examining their shape, size, and locking mechanism. Some clips are push-in, others are screw-in or retaining clips. Look for clips with a plastic or metal body, and check if they have wings or tabs for removal. Use specific removal methods based on clip type: pry for push-in clips, unscrew for screw-in, and gently compress or leverage for retaining clips. Recognizing these differences helps prevent damage.
Is It Necessary to Apply Lubricant Before Removal?
No, you don’t always need to apply lubricant before removal, but it can help. Using a lubricant like WD-40 can make clip removal smoother and reduce the risk of breakage. Applying lubricant also aids in clip corrosion prevention, especially if they’re stuck or rusty. Just spray a small amount around the clip, wait a few minutes, then gently remove the panel. This approach minimizes damage and prolongs clip life.
How Do I Prevent Damage to the Surrounding Panels?
To prevent damage to surrounding panels, carefully observe the panel alignment and clip placement before starting. Use gentle prying tools to evenly distribute pressure, avoiding excessive force that could crack or chip the paint. Keep the removal process steady and controlled, making sure each clip releases smoothly. Properly understanding clip placement helps you avoid unnecessary stress on adjacent panels, ensuring a safe and damage-free trim removal.
Can I Reuse Clips After Removal?
Did you know that around 80% of clips can be reused if removed carefully? You can often reuse clips after removal, but it depends on their condition. Inspect the clips for cracks or damage before reinstalling. If they’re compromised, consider clip replacement options like purchasing new clips from auto parts stores. Proper removal techniques help preserve clip reusability, saving you time and money during your project.

Keze 24Pcs Trim Removal Tool Set with Pick & Clip Removal Tool, Sticker Scraper, Automotive Plastic Pry Tool, Car Panel Door, Stereo, Fastener Remover Kit, for Auto Interior, Molding, Dash(Red)
11 Pcs Trim Removal Tool+1 Pcs Plastic Scraper:Made of High-Strength Nylon Fiber, Ensuring Flexibility and Resistance to Bending…
As an affiliate, we earn on qualifying purchases.
As an affiliate, we earn on qualifying purchases.
Conclusion
Now that you’re armed with these trim removal tricks, you’ll be the hero who can peel off panels without turning your car into a pile of broken clips. Who knew that avoiding plastic carnage could be so easy? Just remember, patience and the right tools are your best friends—because nobody wants a car interior that looks like a demolition site. Happy popping! Your panels will thank you, and so will your wallet.

Tresalto Auto Trim Removal Tool Kit – 5 Piece Set for Dash, Door Panel, Clip Remover – Scratch-Resist Nylon Pry Tools for Interior Car Trims Work – Panel Prying Tools Included – Blue
Non-Scratch Pry Tools: Made from durable nylon, this auto trim removal tool kit protects your car’s surfaces from…
As an affiliate, we earn on qualifying purchases.
As an affiliate, we earn on qualifying purchases.

Doaho 7 Pcs Car Trim Removal Tool Kit with Non-Scratch Plastic Pry Tool and Fastener Clip Pliers for auto Safe Interior Car Panel Detachment, Dashboard, Door Clips & Upholstery – Red
Complete trim removal tool kit: 1 pcs 2-in-1 clip 2 pcs fastener removal tool & 4 plastic pry…
As an affiliate, we earn on qualifying purchases.
As an affiliate, we earn on qualifying purchases.