To prevent corrosion, choose high-quality heat shrink with adhesive lining, like dual-wall tubing, and guarantee your connections are clean and dry. Properly prepare wires, apply the heat shrink snugly over the joint, and evenly heat it to activate the adhesive, creating a waterproof seal. For extra protection, consider using dielectric grease or cover with waterproof tape. If you want to learn how to maximize durability and prevent corrosion long-term, keep exploring these sealing techniques.
Key Takeaways
- Thoroughly clean and prepare wires to remove dirt, grease, and oxidation before applying heat shrink.
- Use the correct size heat shrink tubing and slide it over the connection before making the joint.
- Apply even heat with a heat gun or torch, ensuring complete shrinkage and adhesion without overheating.
- Incorporate dielectric grease prior to shrinking for extra moisture resistance and corrosion prevention.
- Regularly inspect sealed connections for damage or moisture ingress and reapply sealant or heat shrink as needed.
Choosing the Right Heat Shrink for Corrosion Resistance
When selecting heat shrink for corrosion resistance, it’s vital to choose materials that create a reliable moisture barrier and withstand harsh environments. You want tubing that seals tightly to prevent water, salt, and chemicals from penetrating. Adhesive-lined heat shrink is ideal because it forms a waterproof seal when heated, filling gaps and preventing moisture ingress. Look for dual-wall tubing, which offers enhanced waterproofing over standard options. The material should resist chemicals, UV rays, extreme temperatures, and abrasion to guarantee durability in challenging conditions. Polyolefin is a popular choice because of its chemical resistance and toughness. Incorporating proper sealing techniques and selecting the right heat shrink will help protect electrical connections from corrosion, extend their lifespan, and reduce maintenance in demanding environments like marine or salt belt areas. Additionally, considering thermal behavior ensures that the heat shrink performs reliably under high-temperature conditions, maintaining its protective properties. To ensure optimal performance, always verify the material specifications to match your specific environmental needs. Understanding environmental factors can also influence the choice of heat shrink, ensuring it withstands the specific challenges of your application. Being aware of application-specific requirements helps in selecting the most suitable heat shrink for long-term corrosion resistance.
Preparing Your Connections for Effective Sealing
Properly preparing your connections is essential to guarantee an effective heat shrink seal. First, clean the wires thoroughly to remove dirt, grease, or oxidation. Use a wire brush or electrical contact cleaner for this. Next, trim any frayed or damaged wires to ensure a smooth connection surface. Then, apply a compatible connector or crimp to secure the wires firmly. Keep the connection dry and free of debris. Once assembled, slide the heat shrink tubing over the joint. Here’s a visual to help you imagine the process:
| Step | Visual Imagery |
|---|---|
| Cleaning | Wire shiny and free of oxidation |
| Trimming | Smooth, even wire ends |
| Connecting | Tight crimp or soldered joint |
| Covering | Tubing snugly fitted over the connection |
This preparation creates a clean, secure base for ideal sealing. Ensuring all connections are properly prepared enhances the corrosion resistance of the seal and extends its longevity. Additionally, verifying that the connection is free of contaminants helps maintain the air quality around electrical components. Proper connection integrity is crucial for preventing future issues and ensuring long-term performance. Maintaining connection security also helps prevent accidental disconnections and electrical faults. Taking these steps reduces the risk of oxidation and ensures a reliable, durable seal.
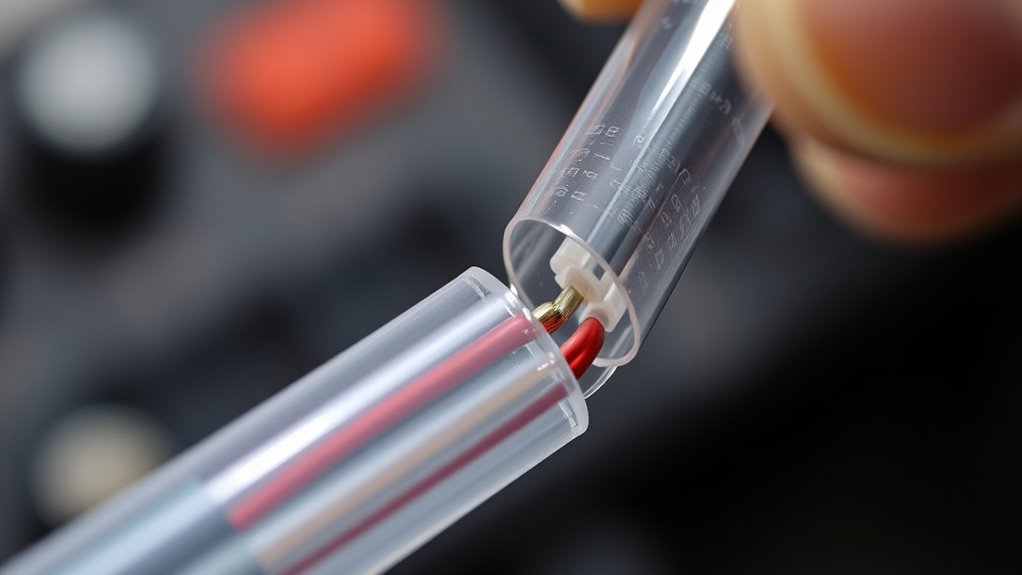
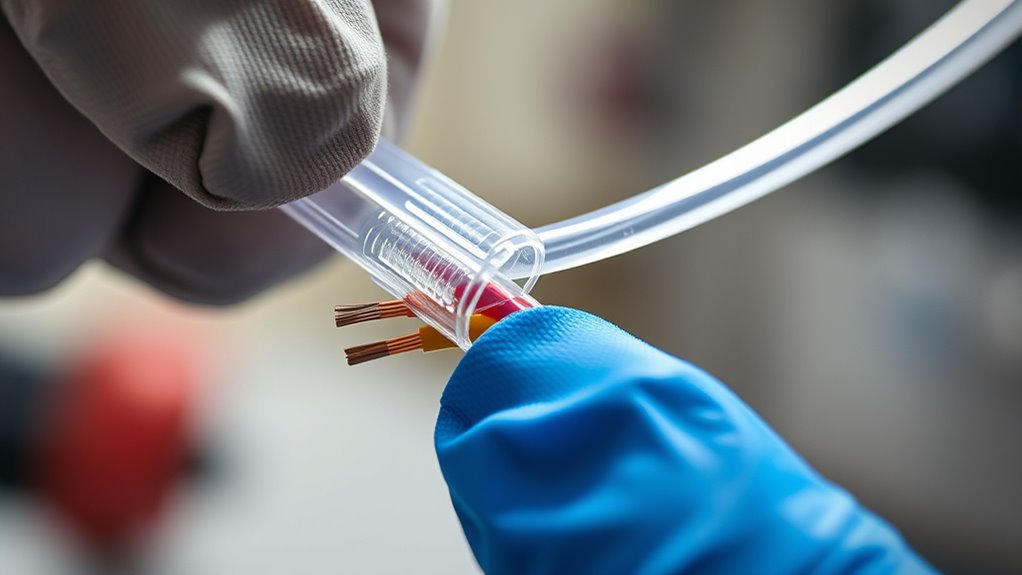
Applying Adhesive-Lined Heat Shrink Step-by-Step

To guarantee a secure and moisture-resistant seal, start by measuring and cutting the adhesive-lined heat shrink tubing to match the length of your connection. Slide the tubing over the connection before joining the wires, ensuring it fully covers the joint and some of the cable on each side. Use a heat gun or torch to evenly apply heat, rotating the tubing to achieve uniform shrinkage. Be careful not to overheat, which can damage the tubing or wiring. Once the tubing has shrunk tightly around the connection, allow it to cool completely before handling. This cooling step solidifies the adhesive’s bond, creating a waterproof, corrosion-resistant barrier that shields your connection from moisture and environmental damage. Proper application of heat shrink tubing is essential for durable drone connections that withstand harsh conditions and prolong equipment lifespan. Additionally, choosing the correct size and type of heat shrink tubing ensures optimal sealing performance and durability over time. Ensuring proper application techniques is crucial for achieving the best results and long-lasting protection. Using quality heat shrink materials can further enhance the reliability of your sealed connections, especially when combined with correct preparation methods to ensure a clean and secure fit.
Enhancing Durability With Additional Protective Measures

After applying adhesive-lined heat shrink, you can further boost the durability of your connections by adding extra protective measures. One effective way is to use dielectric grease on the connection before shrinking the tubing, which provides an extra moisture barrier and reduces corrosion risk. Additionally, consider wrapping the joint with waterproof tape or coating it with liquid sealants for added security against water ingress. When possible, relocate connectors to sheltered areas, away from harsh elements. Regularly inspect your sealed connections for signs of oxidation or looseness, and reapply protective layers as needed. Incorporating seasonal checklists can help you stay on top of maintenance tasks and ensure your connections remain secure over time. Using protective coatings can further enhance resistance to environmental stressors, extending the lifespan of your connections. Understanding corrosion resistance is key to choosing the right protective measures for your specific environment. Applying environmental stressors awareness helps you select appropriate sealing techniques to combat harsh conditions. Combining heat shrink with these measures guarantees your connections stay protected longer, especially in demanding environments, extending their lifespan and maintaining reliable performance over time. Additionally, selecting materials with high chemical compatibility can prevent degradation caused by pool chemicals or other substances in the environment.
Inspecting and Maintaining Sealed Connections Over Time
Regularly inspecting your sealed connections guarantees they remain effective and reliable over time. Check for signs of damage, like cracks or deformation in the heat shrink, and look for moisture or corrosion around the seal. Confirm the heat shrink remains snug and intact, especially after exposure to harsh conditions. Use the following table to identify issues and actions:
| Issue | Indicator | Action |
|---|---|---|
| Cracks or tears | Visible damage on heat shrink | Reapply heat shrink or replace |
| Moisture ingress | Dampness around connection | Re-inspect, reseal if needed |
| Corrosion | Rust or discoloration | Clean, re-seal, consider additional protection |
A thorough understanding of environmental exposure can help prevent issues like corrosion. Additionally, selecting the right sealant materials based on your specific environment can extend the lifespan of your sealed connections.
Frequently Asked Questions
Can Adhesive-Lined Heat Shrink Be Reused After Installation?
You can’t reuse adhesive-lined heat shrink after installation. Once heated, it forms a tight, sealed barrier that melts and molds to the connection, making it impossible to remove or reuse without damaging the tubing. If you need to make adjustments or repairs, you’ll need to cut off the used shrink and apply a new piece. Always measure carefully before installation to avoid the need for reapplication.
What Is the Maximum Temperature Adhesive-Lined Heat Shrink Can Withstand?
Think of adhesive-lined heat shrink as a resilient shield, capable of withstanding intense conditions. It can endure temperatures up to 125°C (257°F) without losing its protective properties. When exposed to higher heat, the adhesive may soften, compromising the seal. So, you should avoid surpassing this temperature limit during installation or use. Keeping within this range ensures your connections stay sealed and corrosion-resistant, like a fortress standing strong against the elements.
Is There a Difference Between Clear and Colored Heat Shrink for Corrosion Sealing?
Yes, there is a difference between clear and colored heat shrink for corrosion sealing. Clear tubing allows visual inspection of the joint without removing the seal, which is useful for maintenance. Colored tubing, on the other hand, offers better visibility and identification, plus it can provide an extra layer of UV protection. Both types effectively seal connections, but your choice depends on whether inspection or color coding is more important for your application.
How Long Does Adhesive-Lined Heat Shrink Maintain Its Protective Properties?
Adhesive-lined heat shrink maintains its protective properties for many years, often 10 to 20, depending on environmental conditions. You should regularly inspect your sealed connections, especially in harsh environments like salt belts or extreme temperatures. Proper application, including thorough heating and cooling, ensures the seal’s longevity. When maintained, this type of heat shrink effectively prevents moisture ingress and corrosion, giving you reliable, long-lasting protection for your electrical joints.
Can Heat Shrink Be Applied Underwater or in Wet Conditions?
Yes, you can apply heat shrink underwater or in wet conditions, but with precautions. Make sure the tubing is specifically designed for moisture resistance, like adhesive-lined or dual-wall types. Confirm the connection is as dry as possible before application, and use a heat gun with a focused airflow. Properly heated, the adhesive lining creates a waterproof seal, protecting against corrosion even when submerged. Always follow manufacturer instructions for best results.
Conclusion
When you take the time to choose and apply the right heat shrink, you’re giving your connections a gentle hug that keeps out the elements. With a little care, your sealed wires will stay cozy and protected, even as time gently passes. Remember, a well-maintained seal is like a good friendship — it keeps things running smoothly and quietly, so you can enjoy peace of mind without much fuss.