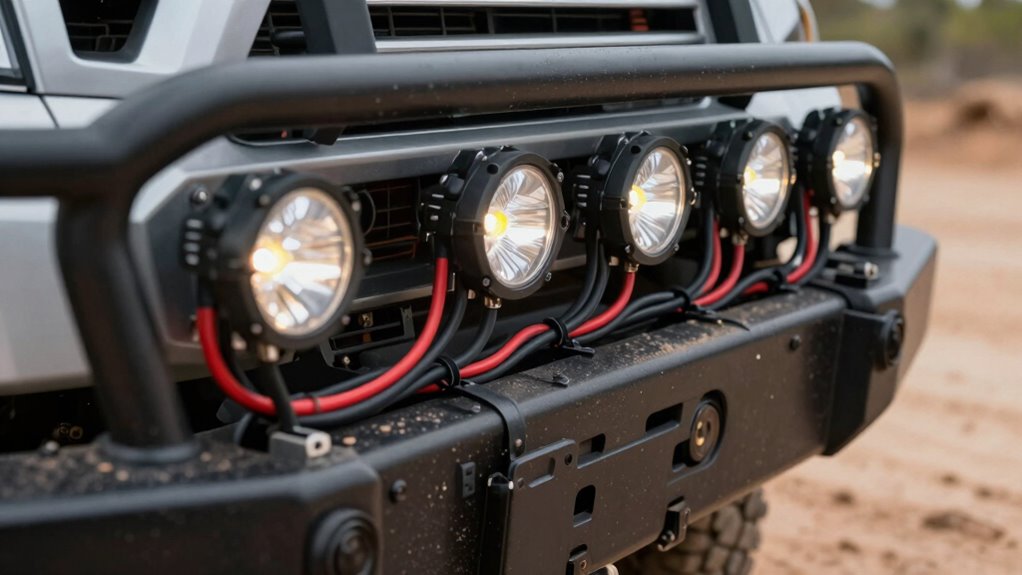

To prevent shorts when wiring lights on your trail rig, route wires away from sharp edges, moving parts, and heat sources. Use grommets and protective sleeving to guard against abrasion, and keep power and signal lines separate at right angles to reduce interference. Secure wires firmly to prevent movement and wear, and install fuses close to the battery for immediate protection. Proper cable sizing and environmental shielding also help guarantee safety—continue exploring for more essential tips.
Key Takeaways
- Route wires away from sharp edges, moving parts, and pinch points to avoid insulation damage and shorts.
- Use grommets in metal holes and protective sleeves to prevent abrasion and insulation wear.
- Keep power and signal lines separated and cross at right angles to minimize electromagnetic interference.
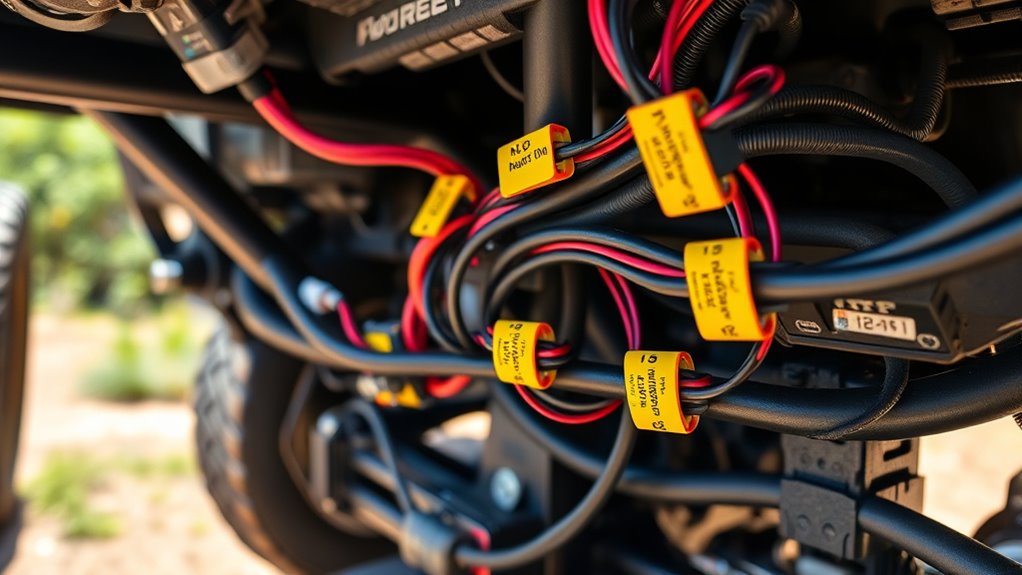
- Secure wiring with zip ties or clamps every 6–12 inches to prevent movement and rubbing.
- Place fuses close to the power source and ensure proper grounding to protect circuits from shorts.

Rig Rite Manufacturing 610 Marine 1" Black Rubber Rigging Grommet
Black rubber and plastic grommet
As an affiliate, we earn on qualifying purchases.
As an affiliate, we earn on qualifying purchases.
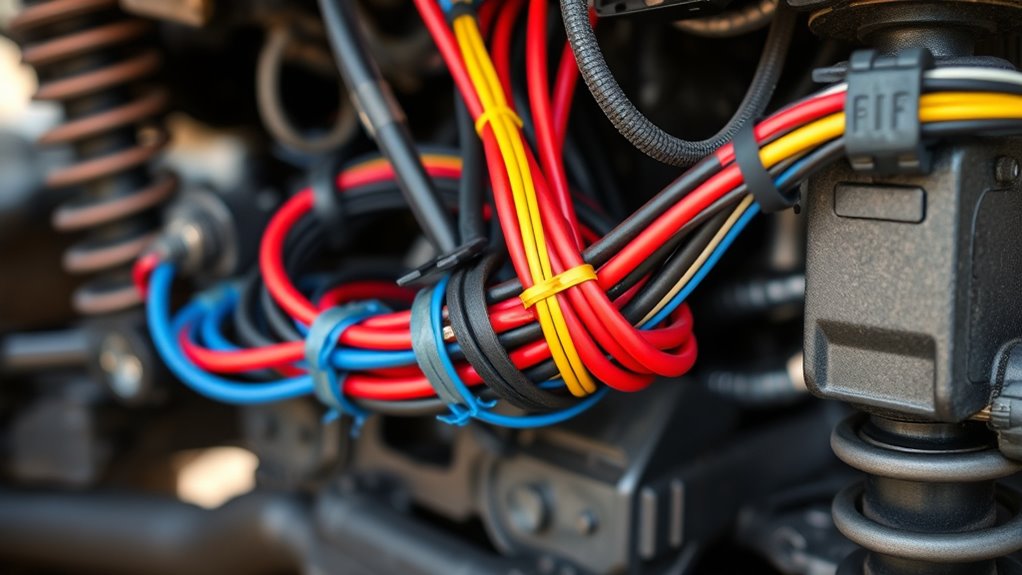
Keep Wires Away From Sharp Edges and Moving Parts
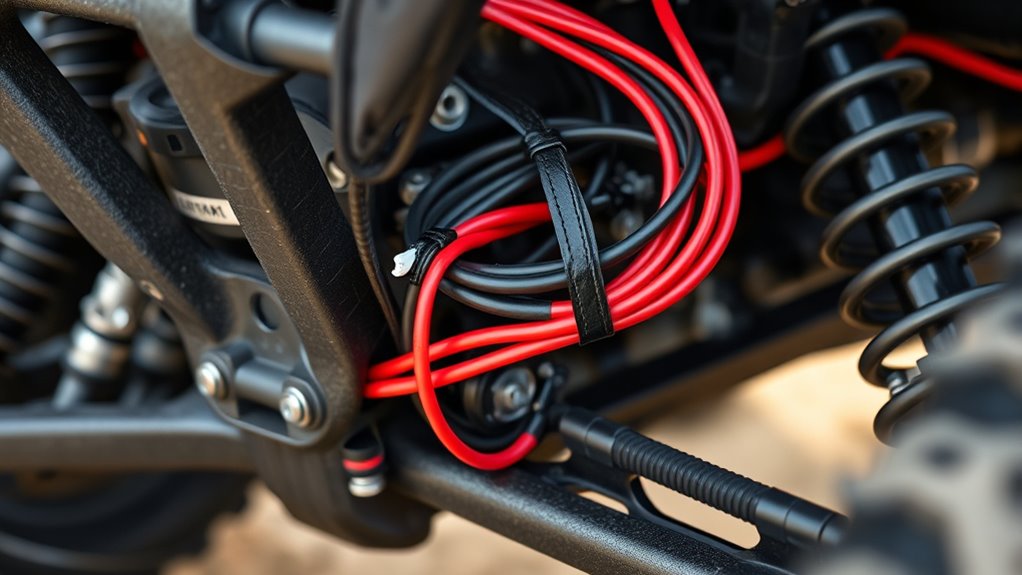
To prevent wiring damage, you should route wires away from sharp edges and moving parts. Avoid running wires along frame edges, hood hinges, or suspension linkages where chafing can occur. Sharp metal edges can cut insulation over time, risking shorts and fires. Install grommets whenever wires pass through metal panels to cushion against abrasion. Use split loom, convoluted tubing, or braided sleeves over harnesses in high-contact zones to provide mechanical protection. Secure wires with zip ties or adhesive mounts every 6–12 inches to prevent movement that might cause rubbing. Keep wiring away from pinch points like door jambs and tailgate hinges, which flex repeatedly and can cause insulation wear. Proper routing minimizes wear, preserves insulation integrity, and enhances overall safety. Incorporating European cloud innovations can also improve monitoring and diagnostics of wiring systems for added safety and efficiency. Additionally, considering advanced insulation materials can further extend the lifespan of wiring in demanding environments. Employing automotive wiring harnesses designed for rugged conditions can further enhance durability and reliability. When planning your wiring route, consider environmental factors such as exposure to moisture, dirt, and temperature extremes, to ensure long-term performance.

Alex Tech 25ft – 1/2 inch Cord Protector Wire Loom Tubing Cable Sleeve Split Sleeving For USB Cable Power Cord Audio Video Cable – Protect Cat From Chewing Cords – Black
Size: Diameter: 1/2"| Length: 25 Feet | Color: Black. Our wire loom is split and easy to load…
As an affiliate, we earn on qualifying purchases.
As an affiliate, we earn on qualifying purchases.
Use Protective Grommets and Sleeving to Prevent Abrasion
Wiring passing through metal panels or areas with potential for contact should be protected with grommets. Grommets prevent sharp edges from cutting into insulation, reducing the risk of shorts caused by abrasion. When routing wires through holes in metal, always install a grommet to cushion the wire and distribute pressure evenly. In high-contact zones, add sleeving like split loom, convoluted tubing, or braided sleeve to shield the entire harness. These coverings provide an extra layer of protection against rubbing, vibration, and debris. Secure the wiring with zip ties or adhesive mounts to prevent movement that could wear down insulation over time. Properly protected wiring lasts longer, stays safe, and keeps your trail rig’s electrical system reliable under tough conditions.

Wiring Harness 1 Lead, Nirider 12V 40A Rocker Switch Relay Fuse Nylon Wiring Harness Kit for LED Light Bars Fog Lights Work Lights Driving Lights Offroad LED Pods Wire Kit for Truck UTV ATV Boat
OVERVIEW – Nirider Nylon Wiring Harness Kit is designed to wire and operate up to 400W auxiliary lights…
As an affiliate, we earn on qualifying purchases.
As an affiliate, we earn on qualifying purchases.
Secure Wiring Properly to Reduce Rubbing and Vibration
To keep your wiring safe from rubbing and vibration, you need to use proper fasteners like zip ties or clamps at regular intervals. Maintaining uniform spacing prevents wires from shifting or loosening over rough terrain, reducing wear. Additionally, protecting the harness with padding or vibration-dampening mounts helps minimize movement and potential damage. Incorporating auditory processing techniques such as sound discrimination can also be useful in diagnosing and addressing wiring issues related to vibration and noise interference. Being attentive to wiring harness layout and routing can further prevent unforeseen problems caused by improper installation. Proper cable management ensures that wires are organized and less susceptible to damage from environmental factors. Furthermore, understanding the Gold IRA markets can help investors diversify their assets and protect their investments from market volatility. Applying quality assurance principles during installation can help identify potential issues early and improve overall reliability.
Use Proper Fasteners
Proper fasteners are essential for securing your trail rig’s wiring and preventing damage from rubbing or vibrations. Using the right fasteners keeps wires firmly in place, reducing wear and potential shorts. Selecting fasteners that are compatible with your wiring materials and environment ensures longevity and safety. Field‑of‑view and imaging‑scale examples highlight the importance of precise setup for reliable performance. Choose fasteners rated for outdoor use and resistance to dirt, moisture, and vibration. Proper fastening guarantees your wiring stays secure, reduces movement, and minimizes the risk of shorts caused by rubbing or vibration. Additionally, implementing proper wiring practices can further enhance durability and safety in demanding trail conditions. Ensuring your wiring is properly ventilated can also prevent heat buildup that might degrade insulation over time.
Maintain Uniform Spacing
Maintaining uniform spacing when securing your wiring guarantees consistent protection against rubbing and vibration. Use zip ties or mounts every 6–12 inches to hold wires firmly in place, preventing movement that can wear insulation. Avoid tight bundling; leave small gaps to allow for slight expansion and contraction. When securing multiple wires, keep them evenly spaced to prevent chafing from contact or friction. Position wiring away from sharp edges, moving parts, and areas prone to flexing. Use protective sleeves or convoluted tubing over high-contact sections for extra durability. Regularly check the spacing after off-road trips, adjusting as needed. Incorporating proper routing techniques ensures wires are less susceptible to damage from vibration and flexing. Proper, consistent spacing reduces stress on the wires, minimizes vibration, and ultimately helps prevent shorts caused by insulation damage. Consistent wiring layout helps ensure reliable protection and extends the lifespan of your electrical system, especially when combined with industry best practices. Additionally, following professional installation guidelines can further enhance the safety and durability of your wiring setup. To further improve longevity, consider using quality connectors that resist corrosion and ensure secure connections.
Protect Against Vibration
Ever wonder how to keep your wiring from vibrating loose and rubbing against moving parts? You need to secure wiring firmly to prevent wear and shorts. First, route wires away from frame edges, hinges, or suspension components to avoid constant rubbing. Second, install grommets where wires pass through metal panels to cushion insulation from chafing. Third, use split loom, braided sleeve, or convoluted tubing over harnesses in high-contact zones for extra protection. Additionally, secure wires with zip ties or adhesive mounts every 6–12 inches to limit movement. Properly wire routing ensures your cables stay in place and reduces the risk of damage. Using cable management solutions like clips and ties helps maintain a clean, organized harness that’s less prone to damage. Visualize a tight bundle running cleanly along the frame, snuggly fastened at intervals, with protective coverings shielding against vibration. Properly secured wiring reduces stress, prevents shorts, and ensures your trail rig runs reliably mile after mile. To further enhance durability, consider protective coverings that guard against environmental elements and wear over time. Incorporating vibration dampening materials can also help absorb shocks and reduce movement that causes wear.
Fastronix 250 Amp MEGA/AMG Fuse Holder Kit
Includes Fuse Holder, 250 Amp Fuse, and Cable Boot Covers
As an affiliate, we earn on qualifying purchases.
As an affiliate, we earn on qualifying purchases.
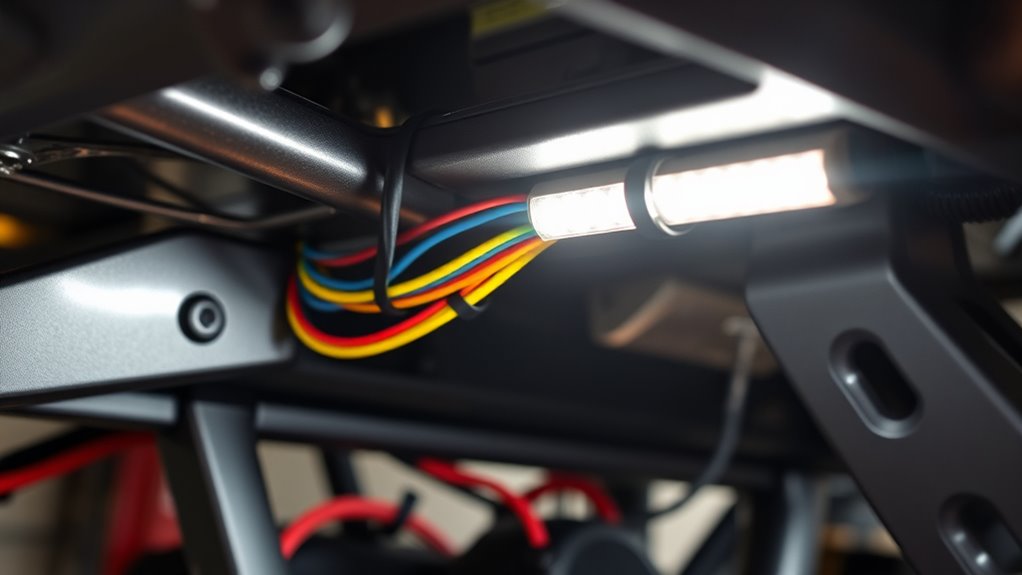
Maintain Clear Separation Between Power and Signal Lines
To prevent interference and shorts, you should route high-voltage power lines separately from low-voltage signal and ground wires. Group positive power cables together and keep ground returns on dedicated paths to simplify troubleshooting. When crossing these lines, do so at right angles to minimize coupling and insulation wear.
Separate High and Low Voltage
Separating high-voltage power lines from low-voltage signal and ground wires is essential to prevent electromagnetic interference and accidental shorts. When these wires run close together, they can induce currents that disrupt signals or cause shorts. To avoid this, keep these practices in mind:
- Route power cables along one side of the vehicle, keeping them away from signal and ground wires to minimize electromagnetic coupling.
- Use separate conduits or loom for high-current feeds and low-voltage circuits, preventing accidental contact or shorts.
- Cross power and signal wires at right angles whenever they intersect, reducing magnetic coupling and the risk of interference or insulation wear.
- Incorporate proper shielding around sensitive signal wires to further reduce electromagnetic interference and improve overall system reliability.
- Regularly inspect and maintain wire insulation to ensure that circuit integrity remains intact and prevents potential shorts or signal loss. Additionally, utilizing proper wiring techniques can further enhance safety and system performance.
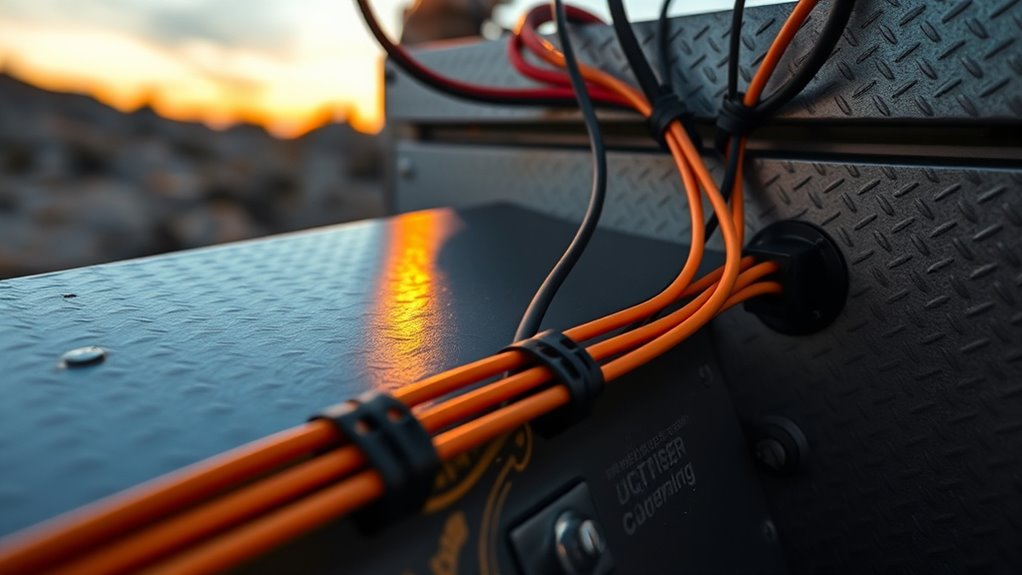
Use Distinct Cable Bundles
Maintaining distinct cable bundles for power and signal lines is essential to prevent electromagnetic interference and reduce the risk of shorts. Keep high-current power cables separate from low-voltage signal wires to avoid noise issues and accidental contact. Group positive power lines together and run ground wires on dedicated paths to simplify troubleshooting. When crossing these bundles, do so at right angles to minimize coupling. Use different colors or labels to identify each group clearly, preventing wiring mistakes. Secure bundles with zip ties at regular intervals, and avoid twisting or bundling incompatible circuits. Here’s a visual guide:
| Power Cables | Signal & Ground Wires |
|---|---|
| High-current feeds | Low-voltage controls |
| Positive power lines | Signal lines for switches |
| Main battery leads | Sensor wiring |
| Fused circuits | Communication cables |
| Separate routing paths | Label or color-code |
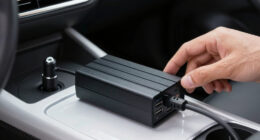
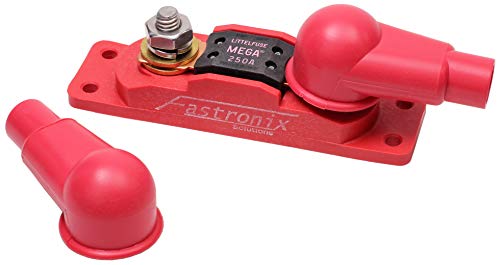
Install Fuses Close to the Power Source for Immediate Protection
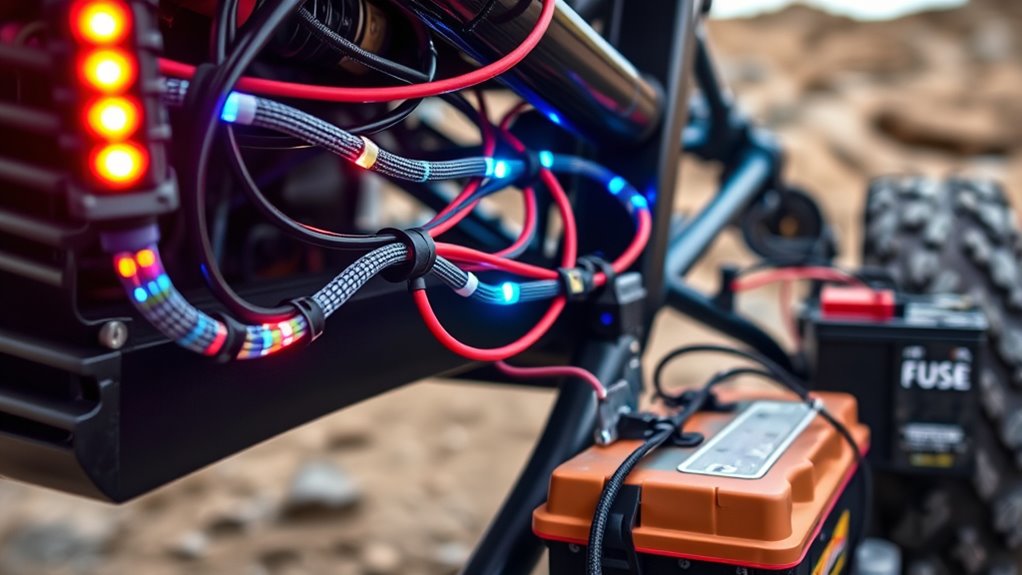
Placing fuses close to the battery guarantees immediate circuit protection in case of a short or overload. This setup ensures that any fault is quickly isolated, preventing damage and fire hazards. Visualize these key steps:
Position fuses near the battery for instant protection against shorts and overloads.
- Imagine a compact fuse holder mounted tightly near the positive terminal, ready to cut power instantly when needed.
- Picture the fuse rated precisely for your accessory’s current, ready to blow if the circuit draws too much, stopping overheating.
- Envision the wiring secured with waterproof, heat-resistant terminals that resist moisture and debris, maintaining reliable protection.
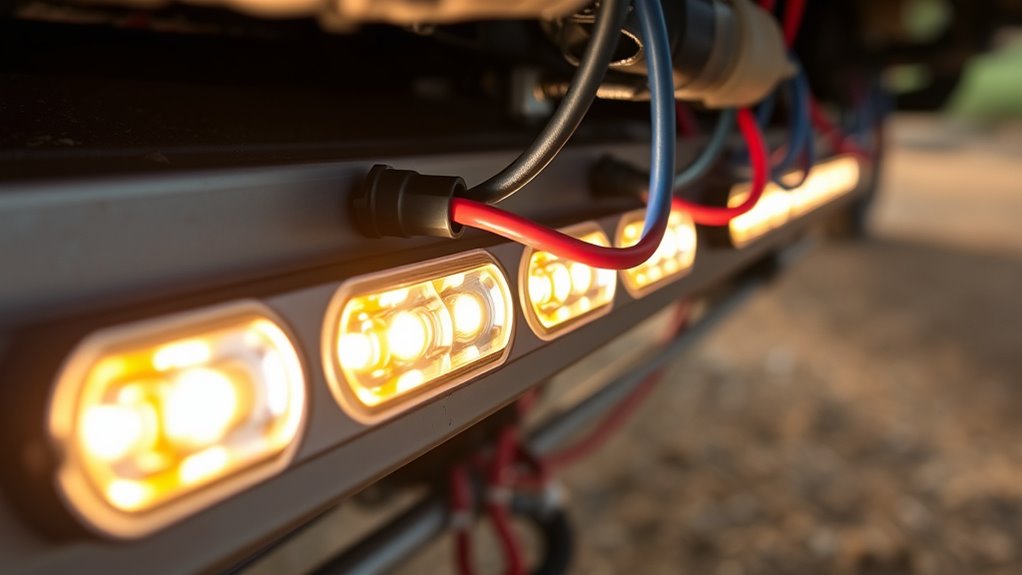
Choose the Correct Wire Gauge to Handle Current Loads

Choosing the correct wire gauge is essential to safely handle your circuit’s current load and prevent overheating or shorts. Use wire size charts to match gauge with your circuit’s amperage and length. Undersized wires can overheat, melting insulation and causing shorts, while oversized wires are unnecessary and harder to work with. For long runs or high-current lights, upsize the gauge to reduce voltage drop and keep connectors within safe temperatures. Properly terminate wires with crimp or solder joints, then heat-shrink to prevent hot spots. Avoid “necking down” gauge too early—plan distribution points for safe gauge reduction. Selecting the right wire gauge ensures your system runs efficiently and minimizes the risk of shorts or fire hazards.
Protect Wiring From Heat, Moisture, and Corrosion
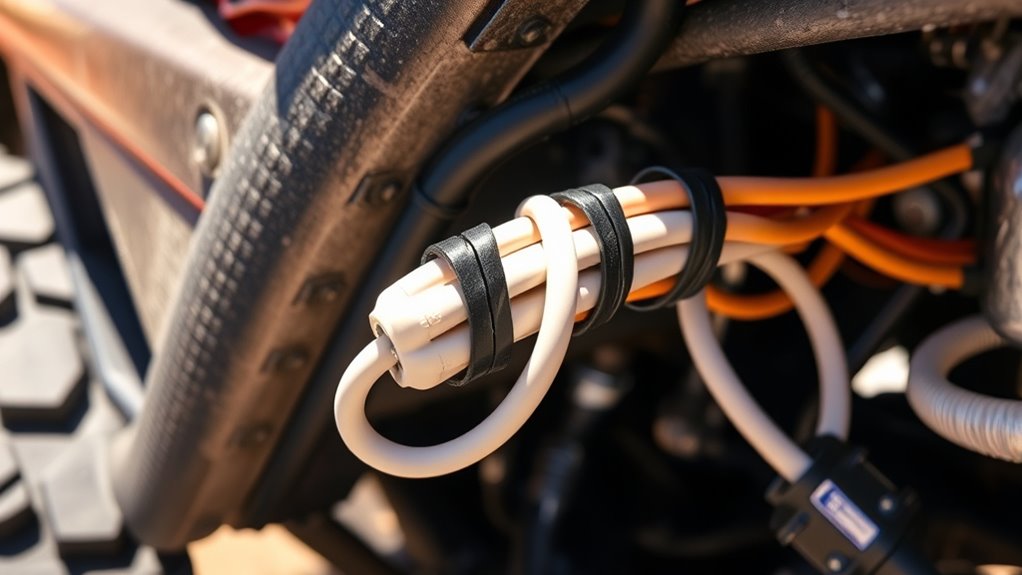
Wiring in off-road conditions is exposed to heat, moisture, and corrosion, which can quickly degrade insulation and cause shorts or failures. To safeguard your wiring, you need to take specific steps.
- Route wires away from hot components like exhausts, turbochargers, and engine zones to prevent melting insulation.
- Use heat-resistant sleeving or reflective tape where wiring must pass near heat sources, extending insulation life.
- Select marine-grade, tinned copper wire and sealed connectors for wet and salty environments to prevent corrosion.
Seal all connector interfaces with dielectric grease or heat-shrink with adhesive to keep moisture out. Regularly inspect grounding points for corrosion, as this can increase resistance and cause shorts or arcing. Proper protection ensures your wiring stays intact and dependable.
Plan for Easy Access and Troubleshooting in Your Wiring Layout
Design your wiring layout with accessibility in mind so you can quickly identify and fix issues when they arise. Place fuse panels, relays, and distribution blocks where you can easily reach them without crawling under the rig. Use clearly labeled wires and color coding for power, ground, and switches to speed troubleshooting. Keep wiring runs neat and organized with zip ties and mounts at regular intervals, avoiding tangled or cluttered bundles. Incorporate test points or diagnostic LEDs on circuits to quickly spot blown fuses or shorts. Document your routing with diagrams or labels at both ends, so you know exactly where each wire goes. Regularly inspect and maintain connections, ensuring fast access for repairs, which minimizes downtime and prevents small issues from becoming major shorts.
Cross Wires at Right Angles and Label for Safety and Simplicity
When crossing wires, it is vital to do so at right angles to minimize electromagnetic interference and reduce the risk of insulation wear that can lead to shorts. This practice keeps signals clean and prevents unintended cross-connections. To enhance safety and simplicity, consider these tips:
- Use color coding or labels on each wire group to quickly identify power, ground, and signal lines during troubleshooting.
- Cross wires neatly, avoiding tangles, so they stay organized and accessible.
- Install clear labels at connection points, making future inspections and repairs faster and safer.
Frequently Asked Questions
How Can I Identify if My Wiring Is at Risk of Chafing or Abrasion?
You can identify wiring at risk of chafing or abrasion by inspecting it regularly for signs of wear, such as fraying, cracks, or shiny spots on the insulation. Check for wires that run near sharp edges, moving parts, or pinch points like door jambs and hinges. Feel for any looseness or rubbing against surfaces, and make certain protective coverings like grommets, split loom, or braided sleeves are intact and properly positioned.
What Are the Best Materials for Waterproof and Corrosion-Resistant Wiring?
Did you know marine-grade wiring is rated to withstand harsh environments? You should use tinned copper wire and sealed connectors for waterproof, corrosion-resistant wiring. Tinned copper resists rust and salt damage, extending your wiring’s lifespan. Seal all connections with dielectric grease or heat-shrink with adhesive, especially in wet or muddy conditions. These materials guarantee your wiring stays protected from moisture, salt, and debris, preventing shorts and maintaining reliable performance on your trail rig.
How Often Should I Inspect and Re-Secure My Wiring Harnesses After Off-Road Use?
You should inspect and re-secure your wiring harnesses after every off-road trip. Regularly check for signs of chafing, loose zip ties, or damaged grommets, and tighten or replace fasteners as needed. Focus on areas where wires pass through panels or near moving parts. Conduct visual inspections and tug tests to make certain everything stays in place, preventing future shorts and maintaining reliable electrical connections during your next adventure.
What Is the Proper Way to Test for Shorts in a Complex Wiring System?
Think of testing for shorts like Sherlock Holmes hunting for clues. Start by disconnecting all loads, then set your multimeter to continuity or resistance mode. Probe between power and ground wires; a beep or low resistance indicates a short. Check each circuit systematically, inspecting wiring, connectors, and insulation for damage. Isolate suspicious sections, repair or replace faulty wiring, and re-test until you’re confident no shorts remain.
How Do I Determine the Optimal Fuse Size for Different Trail Lighting Accessories?
You determine the ideal fuse size by first checking each accessory’s maximum current draw, usually listed on the device or in its specs. Then, select a fuse rated at or slightly above that current to protect against overloads without nuisance blowing. Use the manufacturer’s recommendations and consult ampacity charts for wire gauge and circuit length. Always install fuses close to the power source for effective circuit protection.
Conclusion
By following these wiring rules, you keep your trail rig safe and reliable. Imagine hitting a tough trail, only to have your lights fail because of a simple short caused by worn wires. Proper routing and protection prevent that heartbreak. When you invest a little time now, you assure your adventure stays smooth and worry-free. Your rig will be ready for anything, so you can focus on the trail, not troubleshooting electrical issues.