
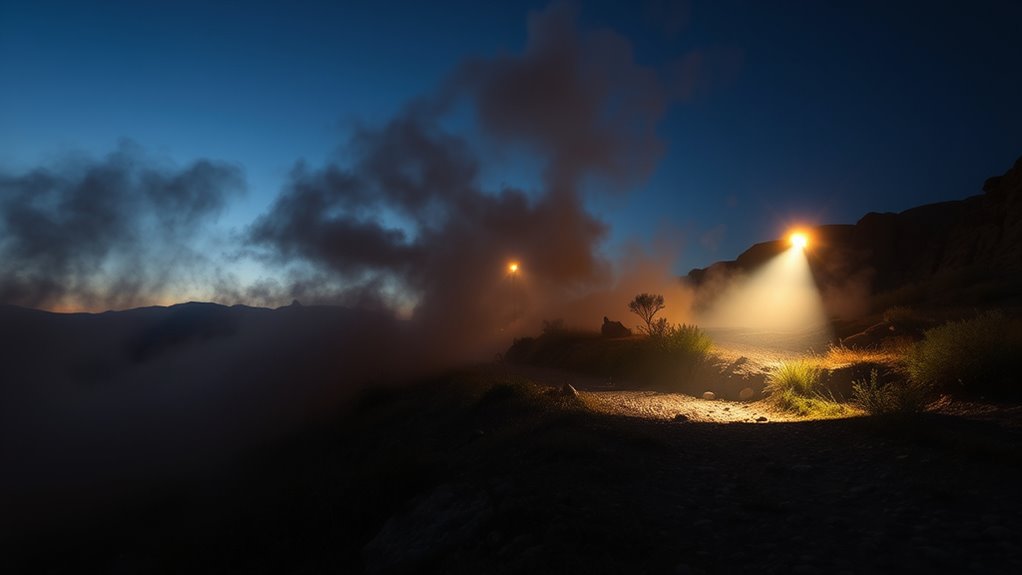
To see more without blinding yourself in dust, position your lights slightly lower and aim them downward at about 20-30°, focusing on the trail right in front of you. Use adjustable mounts or aiming techniques like the wall method to fine-tune your vertical and horizontal angles. Incorporate amber or yellow lenses for dusty conditions and regularly recheck alignment after loads or terrain shifts. Keep these tips in mind to maximize visibility safely—you’ll find more ways to perfect your setup as you continue exploring.
Key Takeaways
- Aim lights slightly downward (20-30°) to reduce glare and backscatter, improving visibility in dusty conditions.
- Mount lights lower and use amber/yellow lenses to minimize dust reflection and enhance penetration.
- Use roadside features and flat walls at 25-50 ft for precise vertical and horizontal alignment.
- Regularly recheck and adjust light aim after load shifts or terrain changes to maintain optimal coverage.
- Opt for adjustable mounts or quick-release brackets for easy, accurate re-aiming in variable off-road environments.

USANOOKS Microfiber Cleaning Cloth Grey - 12 Pcs (12.5"x12.5") - High Performance - 1200 Washes, Ultra Absorbent Microfiber Towel Weave Grime & Liquid for Streak-Free Mirror Shine - Car Washing Cloth
- High Absorbency Grip Root Weave: Locks in 8-10x weight in liquids
- Lint-Free and Scratch-Resistant: Ensures streak-free, mirror shine
- Durable for 1200+ Washes: Long-lasting reusable microfiber cloths
As an affiliate, we earn on qualifying purchases.
Choosing the Right Lighting Placement for Dusty Trails
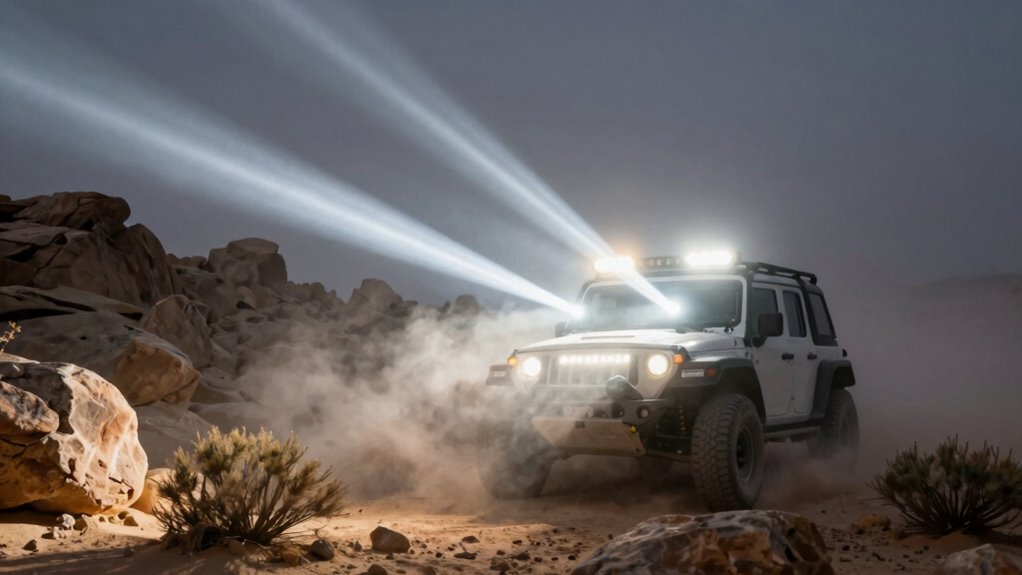
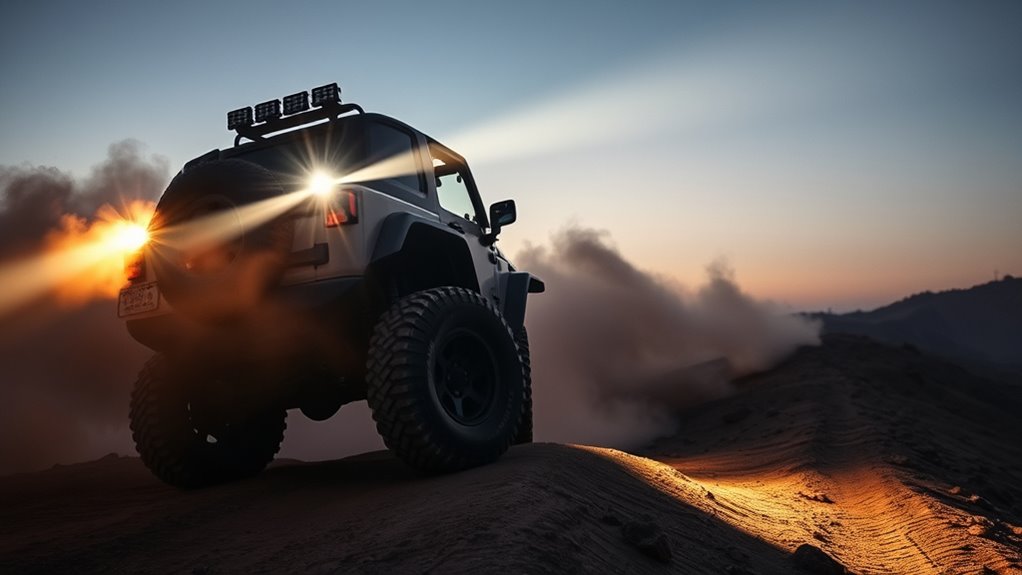
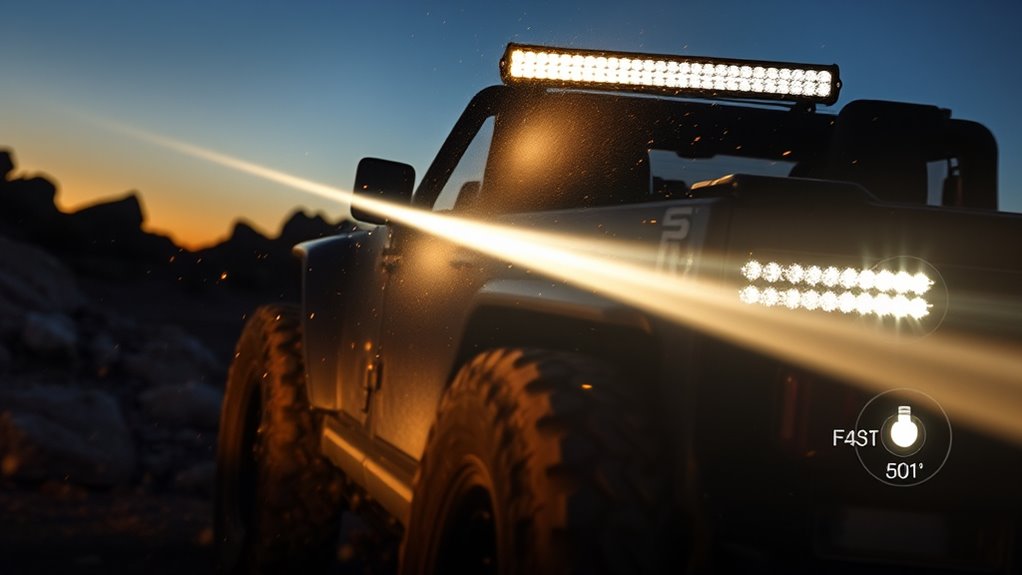
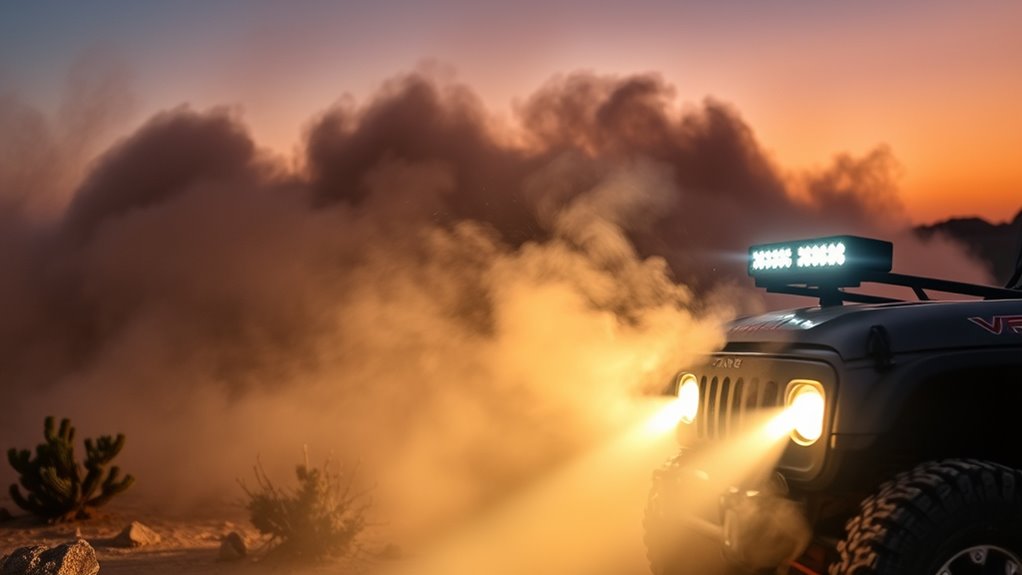
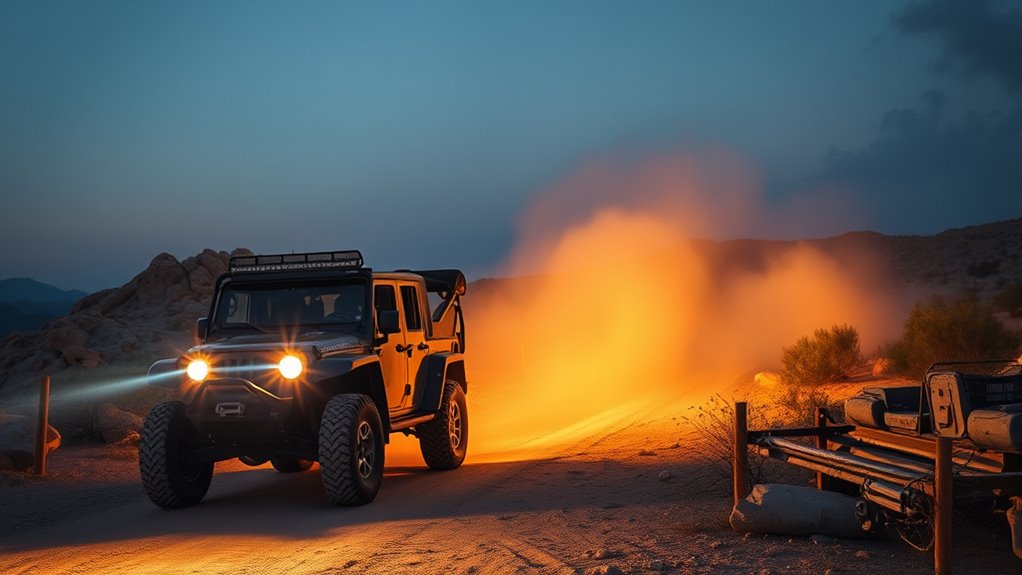
When steering dusty trails, choosing the right lighting placement is essential to maximize visibility and reduce glare. You want your lights positioned to cut through dust without blinding yourself or others. Mount auxiliary lights at the A-pillars for side trail coverage, tilting them downward 20-30° outward to illuminate corners and obstacles effectively. Keep bumper-mounted light bars aimed straight with a slight downward tilt, combining spot and flood beams to balance foreground illumination and long-range visibility. For dust and adverse conditions, opt for amber or yellow lights placed low behind the grille, which minimize backscatter and glare. Test your placement on a level, dark surface using roadside features to fine-tune your aim. Proper positioning guarantees you see more clearly while avoiding the dangers of excessive glare. Additionally, understanding Free Floating principles can help you adapt your lighting setup to changing terrain and conditions for optimal safety. Incorporating European cloud innovation concepts can also enhance your vehicle’s lighting systems with sustainable and energy-efficient solutions tailored for rugged environments. Regularly reassessing your lighting setup ensures continued optimal performance in varying conditions.

HOMEXCEL Microfiber Cleaning Cloth 12 Pack, 12.5 x 12.5 inch Microfiber Towels for Cars, Ultra Absorbent Washing Cloth, Lint Free Streak Free Cleaning Rags for Car, Kitchen, and Window (Grey)
- High Water Absorption: Outstanding absorption for dirt and liquids
- Scratch-Free Cleaning: Soft fabric gently wipes without scratching
- Fast Drying: Rapidly absorbs water for quick drying
As an affiliate, we earn on qualifying purchases.
Proper Vertical and Horizontal Alignment Techniques
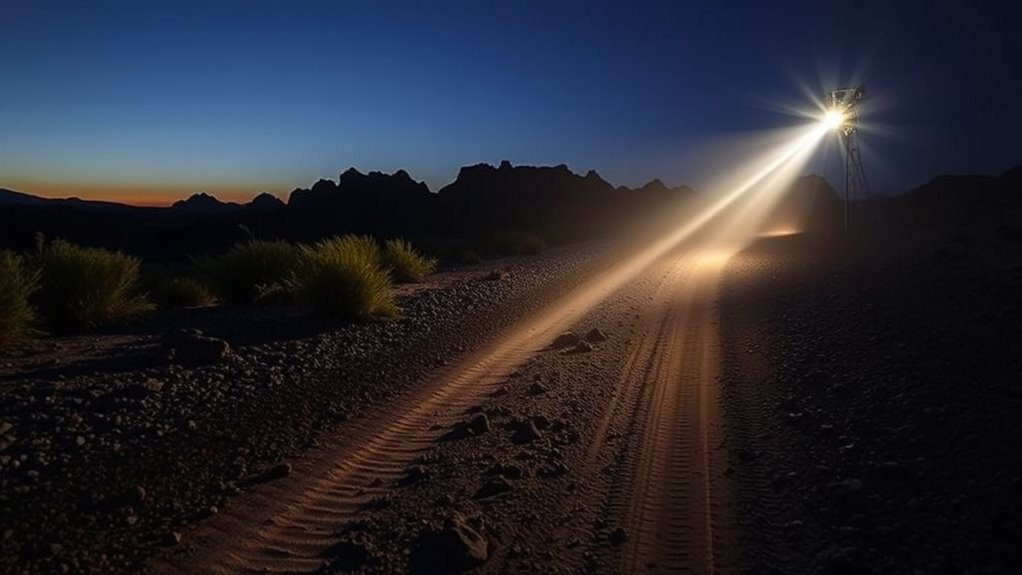
To guarantee your off-road lights are aligned correctly, start by testing on level ground, using nearby features like trees to gauge beam placement. Measure how your beams drop at a set distance to make precise vertical adjustments, and remember to recheck if your load shifts or changes. Fine-tuning these details ensures maximum visibility without blinding others. Additionally, refer to lighting alignment techniques to optimize both vertical and horizontal positioning for safer off-road driving. Ensuring proper light beam pattern not only improves your visibility but also helps prevent glare for other drivers or fellow off-road enthusiasts.
Use Level Ground Tests
Have you ever wondered how to guarantee your off-road lights are perfectly aligned? Using level ground tests ensures your lights hit the right spots without blinding others or losing visibility. Find a flat, open area free of obstacles, ideally with a clear line of sight. Activate your lights and set your vehicle on a level surface. Mark a point at headlight height on a wall or garage door, then measure the beam’s drop at a specific distance, like 25 feet. Adjust your lights so the beam drops within the recommended 40-60%. Repeat the process for horizontal alignment by checking the beam’s center relative to your vehicle’s centerline. Proper alignment techniques ensure optimal visibility and safety during off-road adventures. Incorporating connected equipment can further assist in precise adjustments and monitoring. Regularly performing lighting calibration helps maintain your lights’ accuracy over time, especially when driving on uneven terrain. Additionally, understanding light beam patterns can help you fine-tune your lights for better performance in dust and low-visibility conditions.
Measure Beam Drop Precisely
Accurately measuring beam drop is essential for proper vertical and horizontal alignment of your off-road lights. To do this, park your vehicle on a level surface at a known distance from a wall or flat surface. Mark the initial height of your lights, then turn them on and note the beam’s drop at that distance. Use a measuring tape or a laser level for precision. Adjust your lights so the beam drop matches your desired overlap, typically 40-60% with headlights vertically, and 25-30% horizontally. Here’s a quick reference:
| Distance | Initial Height | Beam Drop |
|---|---|---|
| 25 ft | 3 ft | 1 ft |
| 50 ft | 6 ft | 2 ft |
| 75 ft | 9 ft | 3 ft |
Consistent measurement guarantees ideal aim without blinding others.
Adjust for Load Changes
Load changes, such as adding cargo or fuel, can shift your vehicle’s weight distribution and cause your off-road lights to become misaligned. To maintain proper aim, you need to modify your lights accordingly. Start by checking your alignment after a load change, ideally on a level surface. Use reference points like trees or roadside features for consistency. Consider using advanced tools like reflex actuators for quick adjustments. Remember to:
- Reassess vertical and horizontal aim after loading.
- Adjust the vertical beam to maintain proper distance coverage.
- Slightly shift the horizontal aim inward for a centered beam.
- Use tools or markers for precise realignment.
- Always verify your aim in real-world conditions before heading out.
- Be aware that filtration systems can help prevent dust buildup on your lights, ensuring consistent performance. Proper adjustments ensure your lights illuminate the trail effectively without blinding others, even as your vehicle’s load varies. Additionally, understanding weight distribution can aid in more accurate aiming adjustments and vehicle stability during off-road use. Regularly monitoring your vehicle’s stability helps maintain optimal lighting alignment and safe off-road operation. Paying attention to vehicle suspension behavior can also assist in maintaining consistent light aiming across different terrains, especially when load shifts occur during challenging drives.

AIDEA Microfiber Cleaning Cloth-50PK, Microfiber Towels for Cars, 12×12"
- Super Absorbent Material: Quickly wicks away water and dirt
- Soft and Lint-Free: Scratch-free cleaning on various surfaces
- Reusable and Durable: Washable for hundreds of uses
As an affiliate, we earn on qualifying purchases.
Utilizing Amber and Yellow Lights for Dust Conditions
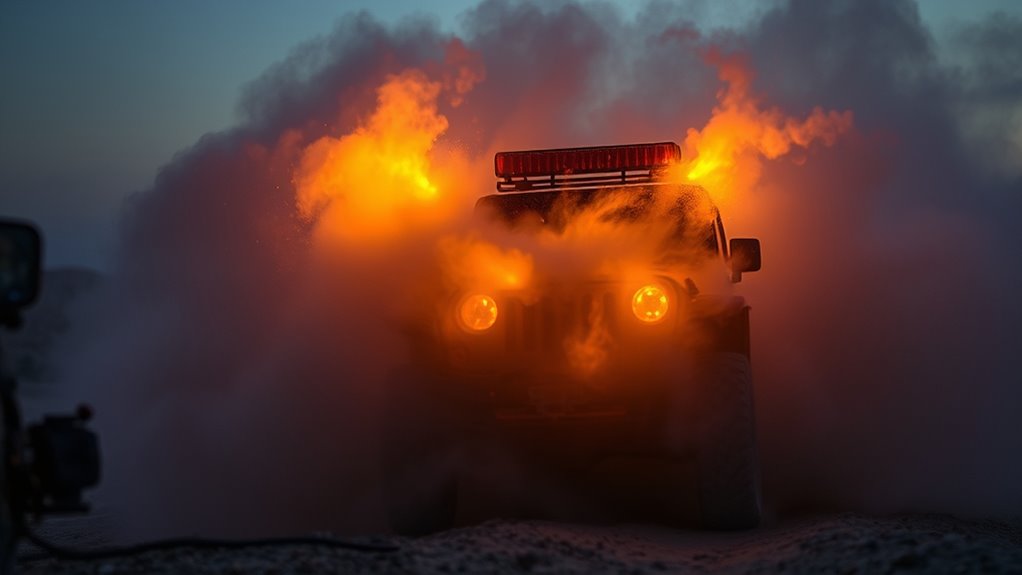
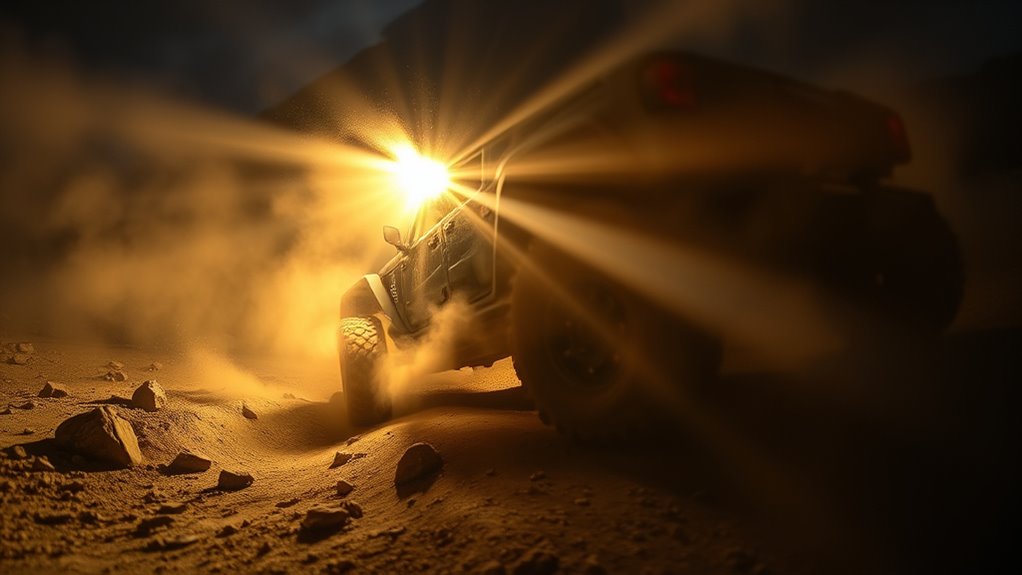
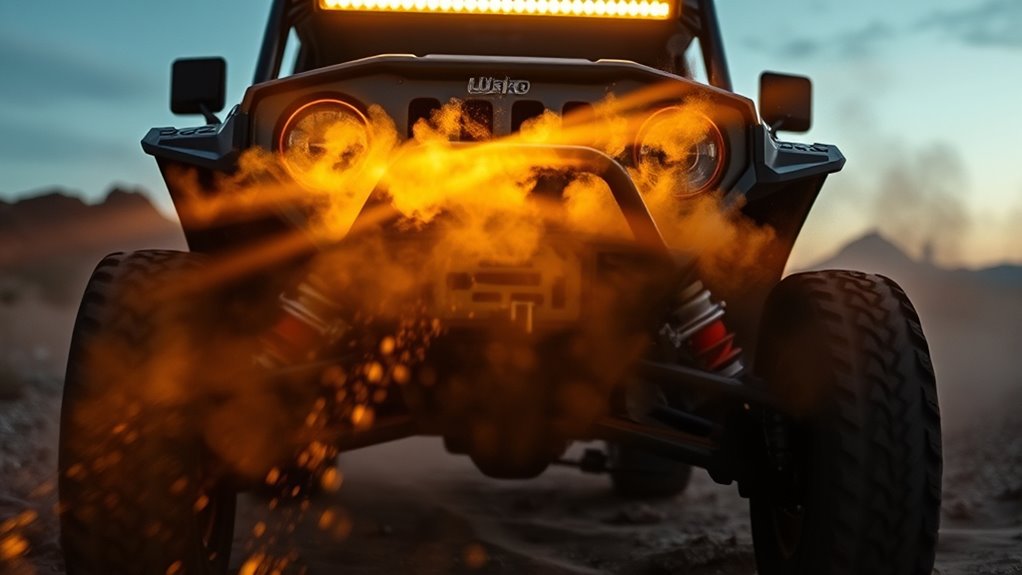
Why are amber and yellow lights essential for dust conditions? These colors help reduce glare and improve visibility by filtering out the haze created by dust particles. Unlike white lights, amber and yellow lights penetrate dust better, allowing you to see obstacles and terrain more clearly without overwhelming reflections. Placing these lights lower on your vehicle minimizes backscatter, further enhancing your view. Slightly angling them outward provides better side vision, helping you detect hazards on the trail’s edges. Use amber or yellow lights in dusty environments to improve depth perception and reduce eye strain. Their ability to cut through haze makes them invaluable for maintaining safety and situational awareness when dust clouds limit your visibility. Proper use of these lights keeps you focused ahead without blinding yourself or others. Additionally, these lights are designed to minimize glare, making them safer and more effective in dusty conditions. Incorporating dust penetration techniques can further optimize your off-road experience.

DEWALT 20V MAX Cordless Drill Driver Set, Electric Drill, Brushless 1/2 In 2 Speed, 2.0 Ah Battery and Charger Included, LED Light (DCD777D1)
- Motor Type: Brushless motor for longer run time
- Size: Compact 7.6-inch design
- Design: Lightweight for easy handling
As an affiliate, we earn on qualifying purchases.
Adjusting Light Aim for Optimal Visibility and Safety
To guarantee your lights are properly aimed, start by fine-tuning the vertical angle, adjusting it so the beams overlap the road safely without blinding oncoming drivers. Use reference objects like trees or signs to gauge the correct horizontal alignment and ensure even coverage. Remember, loading your vehicle changes its stance, so recheck and adjust your lights whenever you carry heavy loads or tow. Maintaining proper lighting alignment is essential for safe and effective off-road visibility. Regularly inspecting and recalibrating your headlight system can also prevent misalignment caused by vibrations or impacts during off-road driving. Additionally, understanding how to maximize vehicle performance can help optimize your lighting setup for better visibility in challenging conditions. Properly aimed lights not only improve your off-road safety but also reduce the risk of blinding other drivers or trail users. Incorporating adaptive lighting techniques can further enhance your ability to see clearly in varying terrain and lighting situations.
Fine-Tune Vertical Aim
Fine-tuning your vertical light aim is essential for maximizing visibility without causing glare or blinding other drivers. Proper vertical adjustment ensures you see the trail clearly while avoiding excessive light scatter. To fine-tune effectively:
- Start with the lights aimed high, then gradually lower them.
- Use a level, flat surface, and roadside reference points for accuracy.
- Measure the beam’s drop at a set distance to maintain consistent height.
- Adjust for vehicle load changes that can shift the beam’s position.
- Test in a dark, open area, watching for glare or shadowy spots.
- Remember that consistent, trustworthy lighting adjustments contribute to better overall safety and visibility.
Use Reference Objects
Using reference objects like trees, roadside signs, or building features helps you accurately adjust your off-road lights for ideal visibility and safety. Find a flat, open area with a clear path ahead. Activate your headlights and auxiliary lights simultaneously. Use nearby objects as benchmarks for vertical and horizontal alignment. For vertical aiming, note the height of the reference object and observe where the light beam hits relative to it—adjust until the beam overlaps the object by about 40-60%. For horizontal alignment, align the beam inward so that it covers roughly 25-30% of the area in front of the reference point. Regularly check these reference points during adjustments to ensure your lights are aimed correctly, providing maximum visibility without blinding oncoming drivers or scattering dust. Proper light aim not only enhances your visibility but also ensures safety for others on the trail.
Adjust for Load Changes
Adjusting your off-road light aim for load changes is essential because added weight from cargo, towing, or passengers shifts your vehicle’s stance, affecting how lights project. When your vehicle’s height or angle changes, your lights may no longer illuminate the intended areas or could blind others. To prevent this, recheck and adjust your lights after loading or unloading. Use tools like reflex actuators or simple aiming methods, such as the wall technique, to refine your aim. Keep in mind:
- Reassess after every load change
- Focus on maintaining proper vertical and horizontal alignment
- Adjust to keep long-range visibility clear
- Minimize glare for oncoming drivers
- Use advanced tools for quick, precise adjustments
- Incorporate smart automation to help maintain optimal light aim even during load shifts
Consistently adjusting for load ensures maximum visibility without risking blinding others.
Leveraging Wall Method for Precise Light Calibration
The wall method offers a straightforward way to achieve precise off-road light calibration by providing a clear, measurable reference point. To start, find a flat, open wall at a known distance—usually 25 to 50 feet away. Park your vehicle facing the wall with your lights turned on. Measure the height of your headlights from the ground and mark this point on the wall with tape or chalk. Turn on your lights and observe the beam pattern. Adjust your lights so the top of the beam aligns with your marked height, ensuring the beam drops gradually to the desired cutoff point. Repeat for each light or beam pattern, fine-tuning as needed. This method ensures your lights are aimed accurately, optimizing visibility without blinding oncoming drivers.
Fine-Tuning Ditch Lights for Side Trail and Obstacle Detection
To enhance your ditch lights for side trail and obstacle detection, focus on precise positioning and angling. Start by mounting them at the A-pillars for ideal side coverage. Tilt the lights downward between 20-30°, aiming slightly outward to expand side visibility without causing glare. For the driver side, target a 10 or 11:00 position; for the passenger side, aim at 1 or 2:00. Adjust each light to maximize obstacle and wildlife detection around corners and narrow trails. Test your setup on a level, dark surface, using roadside features for reference. Fine-tuning involves small, incremental adjustments until you achieve the best balance between side visibility and avoiding blinding yourself or others.
Position ditch lights at A-pillars, tilt 20-30°, and aim slightly outward for optimal obstacle and wildlife detection.
- Mount lights at A-pillars for side coverage
- Tilt downward 20-30° for obstacle detection
- Aim driver side at 10 or 11:00
- Aim passenger side at 1 or 2:00
- Test in a controlled, dark environment
Incorporating Advanced Tools for Dynamic Light Adjustment
Incorporating advanced tools like Reflex Actuators allows you to dynamically control your off-road lighting, making it easier to adapt to changing conditions. With the press of a switch, you can tilt your lights up or down by as much as 20°, instantly adjusting your beam for different terrains or loads. This flexibility helps you maintain ideal visibility without blinding oncoming drivers or getting lost in dust. These tools are compatible with popular light series like Baja Designs LP, XL, S8, and OnX6+. Linking multiple units ensures synchronized adjustments, saving you time and effort. Whether you’re towing, carrying heavy loads, or steering through uneven terrain, Reflex Actuators give you precise vertical control on demand, enhancing both safety and performance during your off-road adventures.
Strategies to Minimize Glare and Avoid Self-Blinding
Effective glare management starts with thoughtful aiming and positioning of your off-road lights. To prevent blinding yourself or others, focus on controlling light direction and brightness. Keep lights aimed slightly downward to avoid shining directly into your eyes or oncoming drivers. Use lower mounting positions to reduce backscatter and dust reflection. Adjust horizontal aim inward to prevent excessive side glare. When in dust or fog, switch to amber or yellow lights to cut through haze without creating harsh glare. Regularly test your setup on a level surface, making small adjustments for ideal light spread. Be mindful of vehicle load shifts, which can alter aim. Properly managing your lights ensures better visibility without impairing your own vision or endangering others.
Proper light aiming reduces glare and enhances visibility without blinding others.
- Aim lights slightly downward for reduced glare
- Mount lights lower to minimize dust reflection
- Use amber/yellow lenses in dust or fog
- Adjust horizontal aim inward for side visibility
- Regularly test and refine your setup
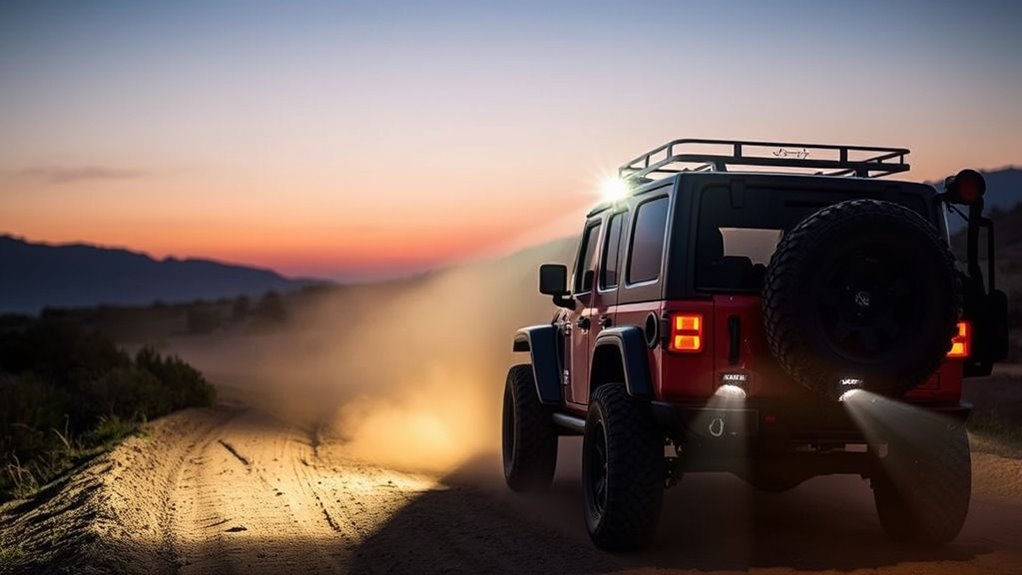
Balancing Foreground Illumination and Long-Range Vision
Achieving the right balance between foreground illumination and long-range vision is essential for safe and effective off-road driving. You want enough light to see obstacles, wildlife, and trail features close up, but not so much that it blinds you or creates glare that hampers your vision at a distance. To do this, aim your lights carefully: keep foreground beams focused just ahead, avoiding excessive brightness that scatters in dust or fog. Use lower-mounted lights or adjustable beams to prevent overwhelming short-range visibility. Simultaneously, ensure your long-range lights are unobstructed and properly aimed to provide clear distant views. Regularly test and tweak your lighting setup, especially when vehicle loads change, to maintain that perfect balance between close-up clarity and far-reaching vision.
Tips for Maintaining Consistent Light Performance in Varying Loads
To keep your off-road lights performing consistently, you need to account for load changes that can shift your aim. Using adjustable mounts makes fine-tuning easy, especially when your vehicle’s cargo or fuel load varies. Regular aim checks ensure your lighting stays ideal, regardless of how much weight you’re carrying.
Adjust for Load Changes
Have you noticed your off-road lights drifting out of alignment after loading your vehicle differently? Changes in cargo or towing weight can tilt your vehicle, causing your lights to aim improperly. To maintain consistent illumination, you need to adjust for these load shifts. Use tools like adjustable mounts or reflex actuators to compensate quickly. Remember, heavier loads can elevate or lower your vehicle’s front, affecting beam height and direction. Regularly check your light aim before each trip, especially after adding or removing gear. Keep these tips in mind:
- Recheck aim after significant load changes
- Use adjustable mounts for quick corrections
- Rely on reflex actuators for on-the-fly adjustments
- Test on level ground to verify beam placement
- Maintain a consistent load to reduce frequent readjustments
Use Adjustable Mounts
Wondering how to keep your off-road lights aligned despite changing loads? Adjustable mounts are your best solution. They let you fine-tune your light angles quickly, ensuring consistent illumination without constantly rechecking. With adjustable mounts, you can easily tilt or pivot lights to compensate for added weight from cargo, towing, or passenger shifts. This flexibility prevents misalignment that can reduce visibility or cause glare. Many mounts feature quick-release or locking mechanisms, so you can make precise adjustments on the fly. Using adjustable mounts also extends the lifespan of your lights by reducing vibrations and unwanted movements. Overall, they give you control, helping you maintain proper aiming regardless of load changes, so you see more and blind yourself less during your adventures.
Regular Aim Checks
How often should you check your off-road light alignment to guarantee peak performance? Regular aim checks are essential, especially after changing loads or terrain. Variations in cargo, towing, or vehicle weight can shift your lights’ aim, reducing effectiveness and increasing glare. It’s best to inspect your lights every few trips or weekly if you’re frequently off-road. Use a level, steady surface, and reference nearby features like trees or roadside markers. Confirm your lights maintain consistent vertical and horizontal alignment. Adjust as needed to keep beams focused and avoid blinding others. Regular checks ensure maximum visibility and safety, helping you see further without causing unnecessary glare. Stay proactive—your lights perform best when maintained consistently.
- Check after load changes or terrain shifts
- Use consistent reference points
- Adjust vertical and horizontal aim regularly
- Inspect before long trips or events
- Keep tools handy for quick adjustments
Frequently Asked Questions
How Do Vehicle Load Changes Affect Lighting Aim Accuracy?
When your vehicle load changes, it can shift the aim of your lights, making them less accurate. Heavier loads, like towing or full gear, can cause the suspension to settle differently, lowering or raising your light beams. To maintain proper aim, you should recheck and adjust your lights after significant load changes, ensuring ideal visibility without blinding others or losing critical peripheral vision.
Can Reflex Actuators Be Used With All Off-Road Lighting Brands?
Yes, reflex actuators can be used with many off-road lighting brands, but not all. You need to verify if your lights are compatible with the specific reflex actuator model, like Baja Designs LP, XL, S8, or OnX6+ series. These actuators are designed for plug-and-play integration, so confirm compatibility before purchase. If your lights are from a different brand, consult the manufacturer or look for adapters to guarantee proper fit and functionality.
What’s the Best Way to Prevent Backscatter in Dusty Conditions?
Backscatter in dusty conditions is like trying to see through fog—you need to minimize glare. To do this, use amber or yellow lights, which cut through dust better than white beams. Keep lights low and angled outward slightly to reduce backscatter reflection. Position lights behind the grille or lower on the vehicle, and aim them carefully. These steps help you see farther without your own lights blinding you in dust.
How Often Should I Recalibrate My Lights for Consistent Performance?
You should recalibrate your lights whenever you notice a change in visibility or after any vehicle modifications, like adding new lights or changing loads. Regularly check and adjust your aim before each off-road trip, especially if driving in dusty conditions, as dust can shift your light’s position. Periodic recalibration ensures consistent performance, ideal illumination, and safety, keeping your lights effective and preventing blinding others.
Are There Specific Light Color Settings Recommended for Foggy or Snowy Trails?
For foggy or snowy trails, you should use amber or yellow lights because they reduce glare and improve visibility. These colors penetrate fog, snow, and rain better than white or blue lights, helping you see more clearly without blinding yourself or others. Keep your lights angled slightly outward and lower to minimize backscatter, ensuring you get maximum penetration without creating glare that hampers your vision.
Conclusion
You’d think brighter lights mean safer trails, right? But sometimes, shining too much can blind you just when you need clear sight the most. So, as ironic as it sounds, the best way to see more is often by aiming less—avoiding glare, using smart techniques, and respecting dust’s tricks. Remember, a well-placed light isn’t just about brightness; it’s about knowing when to turn it down and trust your skill. Stay safe out there.